English
Views: 0 Author: Site Editor Publish Time: 2026-10-09 Origin: Site


The first rule of troubleshooting nitrogen reflow is to confirm the problem is actually the atmosphere. Half the "nitrogen issues" engineers chase turn out to be profile, stencil, or paste problems that nitrogen only makes slightly more visible. So before you touch a gas setting, prove the atmosphere is the cause.
The proof is simple. Look at the oxygen analyzer reading during the defect. If it sits at your target, the atmosphere is probably fine and the defect has another parent. If it is high, drifting, or unstable, you have an atmosphere problem worth chasing. This one check saves hours of blaming the wrong system.
This article is a field guide. It lists the common failure modes, what causes each, and the order to check them. It assumes you already understand what nitrogen should do; if you need that background, our complete guide to nitrogen reflow soldering covers the process end to end. Here we only fix what breaks.
Troubleshooting works best when you start from what you can see, not from what you suspect. A high oxygen reading, a dull joint, a bridge, a tombstone — each points to a different branch. Picking the branch from the symptom keeps you from "fixing" the gas when the stencil was the culprit.
Write the symptom down before you act. It sounds trivial, but a clear symptom note stops the common failure of changing three things and never learning which one worked. The discipline that saves your process also saves your afternoon.
Some defects look like atmosphere problems but are not. Tombstoning from pad imbalance, voiding from paste degradation, and bridging from stencil design all have mechanical and material causes that gas alone cannot fix. We touch those here only to tell you when to stop blaming nitrogen and switch tools. The deeper fixes live in profile analysis, paste handling, and stencil review, not in the gas line.
Keep that boundary clear. Nitrogen is a powerful tool for one specific problem: oxidation during reflow. When the problem is something else, more nitrogen is just more cost. Knowing the difference is most of the skill.
Good troubleshooting needs few tools, which is why it is accessible to any line. The oxygen analyzer is first; it is your truth source for whether the atmosphere is involved at all. A simple draft check with your hand catches most leaks without instruments. A profile recorder tells you whether the thermal side is healthy.
Beyond those, a reference gas for sensor calibration and a basic logbook complete the kit. None of this is exotic. Most lines already own all of it. The missing piece is usually the habit of using the tools in order, from symptom to cause, instead of guessing.
Keep the tools close to the oven and the logbook closer. A reading noted today is what lets you see drift next month. The teams that troubleshoot well are not the ones with the best instruments; they are the ones who write the reading down every shift.
The most common atmosphere alarm is a high or rising oxygen reading. The oven cannot hold its target, so joints lose the protection you paid for. Work through these causes in order; most are cheap and quick.
Worn door seals and slack curtains are the usual suspects. Air seeps in through any gap, and the analyzer climbs. Walk the oven perimeter with nitrogen on and feel for drafts at the openings, hatches, and cable pass-throughs. A draft you can feel is nitrogen you are losing.
Fixes are simple: replace aged seals, re-tension curtains, close forgotten hatches. These are minutes of work and often drop the reading back to target immediately. Seals age quietly, so treat this check as routine, not a one-time fix.
If the nitrogen supply pressure at the oven inlet is below spec, the oven cannot deliver the flow the atmosphere needs. Check the regulator and the line pressure first; a half-closed valve or a depleted tank shows up here before it shows up anywhere else.
Pressure problems are often upstream. A generator near its capacity limit, a tank running low, or a kink in the delivery line all starve the oven. Confirm the supply can actually deliver the flow your baseline calls for, using the method in our nitrogen consumption calculation guide, before assuming the oven is at fault.
Excess exhaust pulls nitrogen out of the chamber along with flux vapors. If someone opened the exhaust "just to be safe," the reading will sit above target no matter how much gas you feed. Trim exhaust back toward the actual flux load, in small steps, and watch the reading recover.
This is also where reducing nitrogen consumption and troubleshooting meet. The same exhaust setting that saves gas when tuned also causes a high reading when opened too far. The fix serves both goals at once.
Oxygen sensors drift over time, and flux vapor can coat the sensor, biasing it high or low. If the reading looks wrong but every leak check is clean, the sensor is a prime suspect. Calibrate it against a known reference, or replace it on the manufacturer's schedule.
Flux contamination is subtler. A sensor near the exhaust path can read the local vapor-rich zone rather than the chamber average. Cleaning the sensor housing and verifying its position often resolves a "mystery" high reading that no seal fix touches.
A cold oven full of air needs time to dilute down to target. If production starts before the reading settles, your early boards run in a half-purged chamber. The fix is scheduling: start nitrogen as the oven heats, and confirm the setpoint before the first board enters.
This is not a defect in the system; it is a routine you skipped. Build the purge wait into the shift start so nobody shortcuts it under production pressure. The first hour sets the tone for the whole day's atmosphere.
A single high reading tells you little. A trend tells you everything. Note the oxygen reading at the start of each shift and at a steady production pace, in the same logbook, week after week. A slow creep upward at constant flow is your early warning for seal wear or supply decline, long before it becomes a defect.
The trend also settles arguments. When someone claims "the nitrogen stopped working," the log shows whether the reading actually moved or whether the product changed. Data beats memory every time, and the cost of collecting it is one line per shift.
Treat the log as a living document. When seals are serviced or the target is changed, note it next to the reading. A log with context is a diagnostic; a log without it is just numbers. The difference shows up the day you are trying to explain why last month's gas bill was lower.
Although reflow rarely needs ultra-high-purity nitrogen, a contaminated supply can still cause trouble. Oil, moisture, or particulates in the line can coat components or interfere with the atmosphere, and they usually arrive from a neglected supply side rather than the oven. Check filters and dryers on the delivery path if the reading is clean but joints still misbehave.
This is a reminder that the nitrogen system is one continuous path from source to inlet. A generator or tank in good shape can still deliver bad gas through a fouled filter. Include the supply filters in the preventive schedule, not just the oven seals, so the whole chain stays clean.
The practical check is simple. If the analyzer reads at target yet defects appear that smell of contamination, look upstream before looking at the oven. A quick sample or a filter inspection often resolves a problem the oven could never have caused.

Nitrogen should make joints brighter, not duller. So a dull joint under nitrogen is a signal that something else is wrong, because the atmosphere is doing its job. Do not reach for more gas; reach for the usual causes.
Dull joints often mean the flux lost its fight before the alloy melted. Activators burn off during preheat; if the profile runs too long or too hot in preheat, the flux is spent by liquidus. More nitrogen cannot restore activators that are already gone.
Check the flux type and its recommended window. A no-clean paste pushed past its activity limit looks dull regardless of atmosphere. Switching paste or tightening the profile usually restores shine faster than any gas change.
If pads arrived oxidized, nitrogen protects them during reflow but cannot undo damage already done. Boards that sat open on the line, or carry aged OSP finishes, may have pads too far gone for any atmosphere to save. The joint forms dull because the bond was compromised before the oven.
This is a storage and handling problem, not a reflow one. Tighten incoming inspection, reduce open-board dwell time, and control humidity. Nitrogen is a shield for good surfaces, not a repair for bad ones.
Too much time above liquidus lets intermetallics grow and surfaces oxidize even under nitrogen, producing grainy or dull joints. The atmosphere cannot shorten a profile you set too long. Pull the time above liquidus back into the paste's recommended window and the appearance usually follows.
The honest takeaway: a dull joint under good nitrogen is almost never the gas. It is flux, pads, or profile. The article on what nitrogen does to solder wetting explains the wetting mechanism, which helps you recognize when the atmosphere is actually the cause and when it is not.
Sometimes the dull joint is not flux or pads but the alloy behavior itself, especially with lead-free SAC pastes that wet slowly and tolerate oxide poorly. If the flux is fresh, the pads are clean, and the profile is in window, yet joints still look off, the paste chemistry or its age may be the limit.
This is where nitrogen's benefit becomes visible by contrast. A line running SAC under air may show dull joints that nitrogen clears up, because the atmosphere removes the oxide burden the sluggish alloy struggles with. If nitrogen is already on and joints are still dull, the alloy's own limits are showing, and no gas change will hide them.
Confirm by comparing a fresh batch of the same paste against the suspect batch under identical atmosphere. If the fresh batch looks right, the issue was paste condition, not the oven. If both look dull, revisit the flux type and the profile together.
When the cause of a dull joint is still unclear after flux, pad, and profile checks, a cross-section settles it. Sectioning a joint shows the bond line, the intermetallic layer, and any voids or incomplete wetting that the surface alone hides. It is a one-time diagnostic, not a daily check, but it ends arguments fast.
A cross-section also teaches the team what a good joint looks like inside, which improves every future inspection. Compare a suspected joint with a known-good one from the same panel, and the difference in wetting extent is usually obvious even to a non-expert.
Use it judiciously. Cross-section destroys the sample, so pick representative boards and keep the record. The goal is a confirmed root cause, not a pile of sectioned scrap. One good section that answers the question is worth more than ten that merely confirm what you already suspected.

Two defect families get blamed on nitrogen but usually are not. Knowing the real drivers keeps you from "fixing" the wrong thing.
Voids, especially under large thermal pads and BGA balls, come mainly from outgassing in the paste and from pad design. Nitrogen helps only at the margin, by letting trapped gas escape before solidification. If voiding is serious, treat paste condition and profile first.
Stale paste, improper storage, or a profile that dwells too long in the outgassing zone will void joints under any atmosphere. Verify paste age and the ramp-to-peak slope before touching the gas. The gas is a supporting actor here, not the lead.
Bridges between fine leads usually start at the printer or the placement machine, not the oven. Too much paste volume, misaligned stencil apertures, or shifted components leave metal where there should be a gap. Nitrogen may pull a near-bridge back into separation, but it cannot fix a stencil that deposits too much.
This matters most on fine-pitch and miniaturized components, where the gap is tiny and the margin is small. When bridges cluster on a specific part, review the stencil aperture and placement accuracy before assuming the atmosphere is involved.
Voids and some bridges hide under packages where your eyes cannot see. X-ray is how you confirm the real defect population instead of inferring it. A voiding problem that looks like "a few bad joints" under the microscope may be a systematic pattern under BGA balls that only X-ray reveals.
Use X-ray before and after any change you make to paste or profile. If the void count drops after a profile tweak, you found the cause. If it stays flat after nitrogen adjustments, the atmosphere was never the driver, and you can stop spending time there.
The discipline is the same as everywhere else in this guide: change one variable, measure with the right instrument, and keep the record. X-ray is simply the right instrument for the hidden defects. Treating it as part of the normal verification, not a special investigation, is what separates lines that improve from lines that guess.
Bridging is most often a volume problem at the stencil. An aperture that is too wide or too long deposits more paste than the gap can hold, and the excess bridges when it melts. Review the aperture design against the component's pitch before blaming the oven, especially as pitches shrink.
Paste volume also interacts with the atmosphere. More paste means more outgassing, which ties back to voiding, and more metal, which ties back to bridging. But the lever is the stencil, not the gas. Thinning the deposit or correcting the aperture addresses the root cause that nitrogen only masks.
A useful check is to measure actual print volume on a suspect part and compare it with the recommend-ed range. If volume is high, the stencil is your fix. If volume is correct and bridges persist, then and only then look at placement accuracy and the profile. The order of investigation matters as much as the investigation itself.

Tombstoning is the defect most often wrongly blamed on the atmosphere. In almost every case it is thermal or design driven, and nitrogen is nearly innocent.
A tombstone forms when the two pads of a small two-pad component heat at different rates, so one joint wets before the other and pulls the part upright. The cause is uneven heat delivery or uneven pad sizes, not the oxygen level. Balancing the thermal path fixes it; more nitrogen does not.
Check pad geometry for symmetry, verify the reflow profile's soak zone, and confirm the component sits flat. These are profile and design levers. Treating tombstoning as a gas problem is a reliable way to spend money and keep the defect.
Asymmetric pad designs and poorly matched land patterns invite tombstoning regardless of atmosphere. The oven cannot compensate for a layout that heats one end faster than the other. Review the land pattern against the component recommendation before blaming the process gas.
Here again, the atmosphere is a scapegoat. When tombstoning appears, reach for the layout and the profile. If those are clean and the defect persists, then and only then look at the atmosphere as a contributing factor rather than the cause.
A less obvious tombstoning driver is how the component sits relative to the thermal gradient in the oven. Parts aligned across the gradient heat one end before the other, inviting the pull-up. Rotating the part or adjusting the thermal profile's soak can equalize the heating and calm the defect.
This is a layout and profile conversation, not an atmosphere one. The oven's job is to deliver even heat; when the part or its placement fights that, nitrogen cannot referee. Review the orientation recommendation for the component and the soak balance in your profile before looking at gas.
The pattern repeats throughout this guide. Tombstoning, like bridging and voiding, answers to mechanical and thermal causes first. The atmosphere is a supporting factor at best. Recognizing that hierarchy is what makes troubleshooting fast instead of expensive.

Some problems show up only at shift start or during product changes. They are routine issues, not equipment faults, but they damage boards if ignored.
The classic startup problem is boards run before the chamber reaches target. The fix is procedural: start nitrogen with heat, verify the reading, then release production. Build the wait into the startup checklist so production pressure cannot skip it.
Track the purge time over seasons, too. A cold winter morning may need longer than a warm one. A simple note in the log prevents the recurring "first panels of the day look off" complaint that has nothing to do with the oven's health.
When a product change suddenly disturbs the atmosphere, or a door is opened, the flow may lag before recovering. If your oven lacks closed-loop control, this lag is manual and slow. If it has closed-loop control, confirm the loop is calibrated and responsive.
Surges also reveal an undersized supply. If the reading spikes every time boards start moving and never fully recovers, your supply may be at its limit. Revisit the consumption calculation and check whether your installed capacity matches your real production pace.
Every time a maintenance door or inspection hatch opens during a run, room air floods in and the reading spikes. If your process requires frequent access, that disturbance becomes a chronic atmosphere problem rather than an occasional one. The fix is to batch the access: do inspections and adjustments during planned stops, not mid-shift.
Where access is unavoidable, curtains and quick-closing hatches limit the damage. A door left open "for a moment" while someone retrieves a tool can take minutes to recover from, and every board through that window runs rich in oxygen. The cost is invisible until you correlate the reading spikes with the access log.
Train the team that the oven atmosphere is a shared resource. One person's open hatch is everyone's dull joint. A simple rule, "close it like you opened it," paired with the reading trend, keeps the chamber where it should be through the whole shift.
A powerful but overlooked troubleshooting step is correlation. When a defect appears, ask which shift ran it and which product it was. Defects that cluster on one shift point to a routine difference, like a shorter purge or a different exhaust habit. Defects that cluster on one product point to that product's design or paste, not the atmosphere.
This step costs nothing and prevents the classic error of "fixing" the oven for a problem a specific product introduced. A quick filter of your defect log by product and shift often reveals the pattern before you touch a setting.
Keep the correlation honest by recording the product and shift with every notable defect. The discipline is the same one this whole guide pushes: write it down, then look for the pattern. The atmosphere is rarely the only variable moving, and the log is how you separate it from the rest.
When the simple causes are ruled out, the oven itself deserves a look. Two checks cover most equipment-side issues, and both relate to features you may already have.
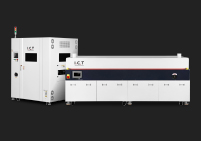
When you evaluate or maintain a convection reflow oven, the closed-loop oxygen control is only as good as its calibration. A loop that reads wrong or responds late will either over-feed gas or let the target drift. Schedule calibration against a reference and verify the response time during a planned check.
A miscalibrated loop mimics every problem above: high readings, unstable atmosphere, wasted gas. Before replacing seals or trimming exhaust, confirm the loop tells the truth. The calibration check is cheap and rules out a whole category of phantom faults.
Some ovens, including I.C.T's dual-rail Lyra series, use an inlet-outlet recirculation design that keeps oxygen use low. If that path is blocked or disabled, consumption rises and the reading becomes harder to hold. Verify the recirculation path is clear and enabled.
This is a design-level check, not a daily one. But after maintenance or a major product change, confirming the recirculation path is intact catches issues that a surface-level check misses. Treat it as part of the post-service verification, so a well-designed machine is not silently running like a poorly designed one.
Most equipment-side atmosphere faults are preventable with a schedule. Calibrate the oxygen sensor on the manufacturer's interval. Inspect seals and curtains quarterly. Verify the recirculation path after any major service. These routine actions catch the slow degradations that otherwise show up as mystery defects months later.
Put the schedule in the same logbook as the reading trend. When a seal is changed, note it. When the sensor is calibrated, note it. The log becomes a maintenance history that explains reading changes instead of obscuring them. A reading that drifts right after a calibration tells you the calibration was wrong; a reading that drifts six months after a seal change tells you the seal aged.
Preventive maintenance is cheaper than reactive troubleshooting because it removes the cause before it becomes a symptom. The oven rewards attention. The lines that never see atmosphere emergencies are the ones that serviced the sensor last month and checked the curtain last week.
When you are standing at the oven with a defect and a clock, a simple decision tree beats a long manual. This section compresses the article into a sequence you can run in minutes.
Start with the oxygen reading. High or unstable reading: check seals and curtains, then supply pressure, then exhaust, then sensor, then purge time. Reading at target but joints dull: check flux activity, pad oxidation, and profile. Voids or bridges: check paste, profile, stencil, and placement. Tombstoning: check pad symmetry and thermal balance.
Notice the pattern. The reading tells you whether the atmosphere is even involved. If it is at target, stop looking at gas and start looking at materials and profile. This single branch point prevents most wasted effort.
Call your equipment or gas supplier when the reading is high despite clean seals, good pressure, sensible exhaust, and a calibrated sensor. That combination points to a deeper machine or supply fault you cannot fix with settings. Also call when a recurring defect survives a full profile and material review; that is beyond atmosphere troubleshooting.
Keep good notes before you call. The supplier will ask for the oxygen reading trend, the supply pressure, the exhaust setting, and what changed recently. A log that answers those questions gets you a fix in one call instead of three. The cost-reduction guide also lists the settings worth checking so you arrive with the easy wins already tried.
The first mistake is changing the gas when the defect is mechanical. Engineers see a bridge or a tombstone, assume the atmosphere, and open the nitrogen flow. The defect persists, because the stencil or the pad design was the cause. Always read the oxygen analyzer before reaching for the gas.
The second is "fixing" a high reading by raising the target instead of finding the leak. The reading drops, the bill drops, and the joints quietly lose protection. The target is not a troubleshooting knob; the leak is. Lower the reading by sealing, not by tolerating.
The third mistake is no logbook. Without the reading trend, every problem looks new and every fix looks temporary. The fourth is touching too many variables at once, so you never learn which change worked. Pick one branch from the symptom, change one thing, measure, repeat. That discipline is most of what separates fast fixes from endless ones.
The decision tree in this section is most useful as a physical card near the oven. Condense it: read the oxygen first; if high, check seals, pressure, exhaust, sensor, purge in that order; if at target, check flux, pads, profile, stencil, placement. Post it where the operator stands, and the right habit becomes the default habit.
A card also standardizes responses across shifts. When everyone follows the same branch order, problems get solved the same way regardless of who is on duty, and the logbook stays consistent. Inconsistency is where atmosphere issues hide and multiply.
Update the card when you learn something new, and initial the change so the team knows it was deliberate. A living card beats a perfect manual nobody reads. The goal is not documentation for its own sake; it is a faster, more uniform fix the next time the reading spikes at 7 a.m.
The usual causes are air leaks through worn seals or slack curtains, low supply pressure at the oven inlet, exhaust set too high, a drifting or flux-contaminated sensor, or insufficient purge time at startup. Check them in that order. Most are quick fixes. Confirm the supply can actually deliver the flow your process needs before assuming the oven is at fault.
No. Nitrogen should make joints brighter by reducing oxide during cooling. A dull joint under good nitrogen usually means the flux lost activity, the pads arrived oxidized, or the profile ran too long above liquidus. Address those causes; more gas will not help a joint whose problem is upstream of the atmosphere.
Rarely, and only at the margin. Voids come mainly from paste outgassing and pad design. Bridging comes mainly from stencil aperture and placement accuracy. Nitrogen can help trapped gas escape or pull a near-bridge apart, but it cannot fix the root material or design causes. Treat paste, profile, and stencil first.
Almost never. Tombstoning is driven by thermal imbalance between the two pads or by asymmetric pad design, not by the oxygen level. Balance the thermal path and review the land pattern. Blaming the atmosphere here spends money without fixing the defect.
They likely ran before the chamber purged down to target. A cold oven full of air needs time to dilute. Start nitrogen as the oven heats and confirm the setpoint before releasing production. Build the purge wait into the startup checklist so production pressure cannot skip it.
Call when the oxygen reading stays high despite clean seals, adequate supply pressure, sensible exhaust, and a calibrated sensor. That points to a deeper machine or supply fault. Also call when a recurring defect survives a full profile and material review. Good notes on the reading trend, pressure, and recent changes get you a faster fix.