English
 Views: 0 Author: Elsa Long Publish Time: 2026-10-14 Origin: Site


Short answer: choosing an SMT stencil printer for high mix low volume production is a different problem from choosing one for a single-SKU line, and the difference is almost entirely in changeover and setup rather than in print quality. A high-volume line optimises one recipe and runs it for weeks, so squeegee speed, alignment latency and cycle time dominate the decision. A high-mix low-volume (HMLV) line changes recipe ten to sixty times a week, so what actually determines daily output is how fast a stencil can be swapped, how quickly the printer can re-learn a new alignment, how long the under-stencil cleaning routine takes between SKUs, how much of the board-support jig has to be rebuilt for a different board size, and how reliably the operator can call up the right program under time pressure. Get those five things right and a mid-class fully automatic printer will out-produce a nominally faster machine that was designed for one product; get them wrong and the fastest printer on the datasheet becomes the line's slowest station.
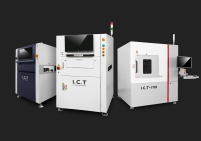
This guide is organised as a decision sequence rather than a feature list, because that is the order an HMLV buyer actually faces the problem: first quantify your changeover load, then examine each of the five mechanics that set it — stencil switching, cleaning, board support, program management and operator workflow — and only then compare specific machines against a one-page decision table. To see the machine families this guide draws from, start at our I.C.T solder paste printer product hub, which lists the semi-automatic, fully automatic inline and long-board classes on common reference boards. If you have not yet narrowed down the machine class at all, the SMT solder paste printer selection guide for production lines walks through the general selection dimensions first; this article assumes you already know you are running HMLV and goes straight at the changeover economics.
Table of Contents
"High-mix low-volume" is one of the most loosely used phrases in electronics manufacturing, and the looseness costs buyers real money. Two factories that both describe themselves as HMLV can differ by an order of magnitude in the number of changeovers they run per shift, and the printer that suits one will be badly wrong for the other. Before any machine comparison is meaningful, the buyer has to convert the vague phrase into three numbers: how many distinct products the line runs, how many boards of each product it runs before changing over, and how many of those changeovers happen in a single shift. Those three numbers — SKU count, batch size and changeover frequency — are the actual specification. Everything else in the selection process is downstream of them.
The reason this matters so much is that a stencil printer has two very different kinds of cost. The first is the per-board printing cost: the six-station cycle of board-in, alignment, squeegee stroke, stencil release, cleaning and board-out, which the throughput literature usually reduces to a single cycle-time number. The second is the per-changeover cost: the minutes spent draining paste, swapping the stencil, rebuilding the board support, re-learning alignment, purging the cleaning system and re-validating the first article of the new product. On a high-volume line the per-board cost dominates because changeovers are rare. On an HMLV line the per-changeover cost dominates because boards are few. A printer's specification sheet is written almost entirely around the first cost and is almost silent on the second, which is exactly why HMLV buyers so often buy the wrong machine. The sections below start by making the second cost explicit.
The practical definition of HMLV used throughout this guide is a printing operation that runs more than about fifteen distinct products per month with an average batch below roughly five hundred boards, and that changes over the printer at least twice per shift. That is intentionally a wide band, because the change that matters is not a single threshold but the ratio between changeover time and run time. A line that changes over in twenty minutes and then runs for six hours is barely affected by changeover; a line that changes over in twenty minutes and then runs for forty minutes is spending a third of its printer time on setup, and that is the regime where printer selection becomes a changeover problem.
The most useful single number to compute at this stage is what this guide calls the changeover duty cycle: the fraction of available printer time that is consumed by changeover rather than by printing. It is calculated as changeover time per event multiplied by changeover events per shift, divided by available printer minutes per shift. A job shop running twelve changeovers of eighteen minutes each across a 450-minute shift lands at 216 / 450 = 48 % changeover duty. A hybrid line running four changeovers of twenty-five minutes across the same shift lands at 22 %. Both are HMLV, but the first needs a printer chosen almost entirely for changeover speed while the second can trade some changeover convenience for print-quality headroom. Compute your own duty cycle before reading further; the rest of this article is written so that the higher your duty cycle, the more weight you should give to sections 3 through 7 and the less to raw cycle time.
A printer optimised for one product is optimised along axes that do not help HMLV, and it usually pays for that optimisation with features that HMLV badly needs. The high-volume design assumptions are: the stencil stays in the machine, the board support never moves, the recipe never changes, the operator's job is to load magazines rather than to think, and the alignment system can be tuned once and left alone. Every one of those assumptions is inverted on an HMLV line, and the machine features that support them — a heavy bolt-down stencil clamp, a machined board-support nest cut for one panel size, a shallow operator interface that only exposes start/stop, an alignment algorithm that assumes stable fiducials — become friction points rather than strengths.
The concrete failure modes are predictable and expensive. The stencil clamp that takes eight minutes to release and refit because it was designed for a once-a-month change destroys a shift that needs six changes. The board-support nest that is machined for one panel means every new board size requires a fresh tooling plate and a new setup, adding ten to fifteen minutes per new product. The shallow operator interface forces recipe changes through an engineering terminal rather than at the machine, which means the printer waits for an engineer every time the product changes. The alignment algorithm that was tuned for one fiducial pattern either over-runs on unfamiliar boards (adding time) or under-locks (adding scrap). None of these show up in a cycle-time comparison, and all of them show up in the daily output chart within a week of commissioning.
Not every HMLV buyer is the same buyer, and the three sub-profiles below require materially different printer priorities. A job shop runs many customers, many board sizes and small batches, often with wide variation in board quality; its changeover frequency is the highest and its batch size the smallest, so it needs the fastest stencil swap, the most forgiving board support and the shortest recipe recall path, and it can accept somewhat lower print-quality headroom because its boards are rarely the densest. An NPI house — new product introduction, running engineering builds before volume transfer — has small batches but extremely demanding boards, with fine-pitch packages, thin stencils and frequent recipe edits; it needs recipe version control, fine alignment and detailed print inspection far more than it needs raw swap speed, because its changeovers are less frequent but its quality tolerance is tighter. A hybrid line runs a small set of stable products at moderate volume alongside occasional new-product runs; it needs the balance of both, and typically picks a mid-class fully automatic printer with good recipe management and a moderate changeover time.
HMLV sub-profile | Typical SKU count / month | Average batch | Changeovers / shift | Highest-priority printer attribute |
|---|---|---|---|---|
Job shop (contract, many customers) | 30–200 | 20–300 boards | 4–12 | Changeover speed — stencil swap, board support reset, recipe recall at the machine |
NPI house (engineering builds, transfers) | 15–60 | 5–100 boards | 2–6 | Recipe version control, alignment precision, print-data logging for engineering feedback |
Hybrid line (stable mix plus new-product runs) | 15–50 | 200–1,500 boards | 2–5 | Balanced: changeover convenience plus print-quality headroom and line integration |
High-volume single-SKU (reference, not HMLV) | 1–5 | 5,000+ boards | <1 | Raw cycle time and CPH |
Read your own line against that table before going further. If you are a job shop with a changeover duty cycle above 35 %, the printer features that matter most are the stencil clamp design, the board-support system and the depth of the operator interface — in that order. If you are an NPI house, the ordering flips: the recipe library, the alignment system and the data-logging capability come first, and rapid stencil swap is a convenience rather than a survival feature. If you are a hybrid line, you are looking for the machine that is mediocre at nothing rather than excellent at one thing, and the decision table in section 8 is written for exactly that case.

The single most valuable thing an HMLV buyer can do before talking to any vendor is to measure their own changeover load accurately. Almost every factory under-estimates it, because the time is spread across several people and several systems: the operator drains the paste, a technician fetches and fits the stencil, an engineer edits the recipe on a terminal, someone rebuilds the board support, and the first-article inspection happens elsewhere. No single person sees the whole twenty-five minutes, so the number that reaches the buyer is usually the four or five minutes the operator personally spends. The result is that buyers compare printers against an imaginary changeover time and then discover, after commissioning, that the new machine has barely moved the number because the constraint was never the machine alone.
This section gives a method for measuring the true changeover load, a breakdown of where the minutes actually go in a typical manual HMLV changeover, and a way to read the resulting curve so that you know which minutes a new printer can realistically remove and which will stay no matter what you buy. Doing this exercise takes about half a day with a stopwatch and a clipboard, and it will change which printer you buy far more than any vendor presentation. It also produces the baseline against which you can measure the payback of whatever you eventually purchase — a number most HMLV factories cannot produce for any of their equipment.
Define the true changeover load as the wall-clock time from "last good board of product A" to "first good board of product B, verified by SPI or first-article inspection" — not from "operator starts" to "operator finishes", and not from "stencil swapped" to "stencil swapped". Written as a formula: changeover load = paste drain + stencil swap + board-support change + recipe recall and edit + cleaning-system purge + alignment re-learn + first-article verify + buffer/wait time. Each term is measurable, and each term has a different owner. Only two of the eight terms — stencil swap and alignment re-learn — are primarily a function of the printer itself. Two more — board-support change and cleaning-system purge — are a function of the printer's mechanical design but also of how much tooling the factory keeps on hand. The remaining four are workflow and organisation, and no printer purchase will fix them. That distribution is the single most important insight for an HMLV buyer: the printer can typically address three to four of the eight terms, and the buyer has to fix the rest internally.
To see how the terms interact with cycle time, it helps to separate the two clocks the printer runs. The per-board clock — the one covered in detail in our guide on how to estimate solder paste printer cycle time and throughput — governs how fast the machine prints once it is running. The per-changeover clock governs how long it is not printing. On an HMLV line the second clock usually costs more than the first, because a five-second cycle-time difference is worth almost nothing when the line only runs forty boards between changes, while a four-minute changeover difference is worth several percent of daily output on every single change. Buyers who benchmark printers on the datasheet cycle time in an HMLV context are optimising the wrong clock, and the error is large enough to overwhelm every other consideration.
A stopwatch study on a typical mid-class fully automatic printer running a manual HMLV changeover — the pattern seen in job shops that have not yet reorganised around fast changeover — produces a bill of time that looks roughly like the table below. The study assumes a product change with a new stencil, a different board outline, a new recipe and a paste type that is shared with the previous product (so no paste change). Numbers are medians from floor measurements across a spread of HMLV lines and will vary by factory; what matters is the relative proportions, because those proportions tell you which investment pays.
Changeover step | Median time | Owner | Reducible by the printer? |
|---|---|---|---|
Confirm last board of previous product, stop the line | 0.5–1.0 min | Operator | No — process discipline |
Drain / scrape paste, return to paste pot or discard | 2.0–4.0 min | Operator | Partly — paste-capture design |
Release old stencil frame, fit new stencil frame | 3.0–9.0 min | Operator | Yes — clamp design |
Remove / rebuild board support (pins, blocks, vacuum plate) | 4.0–10.0 min | Technician | Yes — support system design |
Recall new recipe, edit parameters if needed | 1.0–6.0 min | Engineer | Yes — recipe library and interface |
Purge / clean the under-stencil cleaning system | 1.0–3.0 min | Operator | Partly — cleaning-unit design |
Re-learn alignment, first-article print, inspect | 2.0–5.0 min | Operator + QA | Partly — alignment speed |
Wait for engineer / stencil / tooling to arrive | 0.0–8.0 min | Organisation | No — pre-staging and planning |
Total (median around 25–30 min) | ~25–30 min | — | Printer addresses ~10–25 of those minutes |
The table makes the investment case in a single glance. If a new printer halves the stencil-swap time (from six minutes to three) and halves the board-support rebuild (from seven minutes to three and a half), it removes roughly 6.5 minutes from each changeover. On a job shop running eight changes per shift that is 52 minutes per shift, or about 11 % of a 450-minute shift, recovered without touching anything else. Stack a faster recipe recall and a friendlier cleaning purge on top and the recoverable total often reaches 8 to 10 minutes per changeover — which, at eight changes a shift, is close to 15 % of the printer's available time. That is the number the buyer should be comparing between machines, not the datasheet cycle time, and it is the number that the sections 3 through 7 are each aimed at pulling down further.
Once the eight terms are measured, plot them as a cumulative curve against changeover frequency. The shape of the curve tells you where to invest. On a line running two changes per shift, the fixed organisational terms — waiting for tooling, waiting for an engineer — dominate the curve and the printer's contribution is almost irrelevant; the right investment is pre-staging and cross-training, not a new machine. On a line running six to ten changes per shift, the mechanical terms — stencil swap and board support — rise to dominate, and the printer's design becomes the highest-leverage purchase available. On a line running more than twelve changes per shift, the curve flattens into the organisational terms again, because at that frequency the line cannot keep tooling and stencils staged no matter how fast the printer is, and the answer is usually a second printer or a different line architecture rather than a faster single machine.
That is why this guide places the changeover curve before the machine features: the curve tells you whether the problem is the printer, the tooling, the organisation or the line architecture. If the curve points at the mechanical terms, the following five sections explain what to look for. If it points at the organisational terms — and it often does, especially in first-year HMLV lines — then the highest-return move is to pre-stage stencils and board tooling, cross-train operators to recall recipes at the machine, and standardise product-specific setup on a kanban, all of which cost far less than a printer and all of which a new printer cannot substitute for. Buyers who skip this diagnosis tend to buy a fast-changeover machine to solve an organisational problem, and then report that the machine "did not help". For the wider framework on which machine class fits which situation, the SMT solder paste printer selection guide for production lines covers the class-level decision; this article assumes the class is settled and focuses on the HMLV-specific mechanics.
If an HMLV buyer were allowed to examine only one part of a candidate SMT stencil printer for high mix low volume production, the stencil mounting system would be the right choice. Every product change on an HMLV line requires the stencil to come out and a different stencil to go in, and the design of the clamp that holds it determines whether that operation takes ninety seconds or nine minutes. On a high-volume line the stencil is a once-a-month event and the clamp can be as heavy and as slow as the designer likes; on an HMLV line the same clamp is used four to twelve times a shift and its ergonomics dominate the productivity of the whole machine. Yet stencil-swap time is the specification most often absent from brochures and most often omitted from side-by-side comparisons, because vendors prefer to compete on print accuracy and cycle time where the numbers are flattering.
This section compares the mounting systems available on the market — manual bolt or cam clamp, pneumatic clamp, magnetic-frame system and cassette or trolley system — in terms of what each actually costs per change on a real floor rather than in the demonstration cell. It then sets out what a defensible changeover specification should contain, including the parts vendors usually leave out such as alignment re-learning and the paste roll after swap, and finishes with the storage-and-staging discipline that can cut effective swap time by half without changing the machine at all. The theme running through all three subsections is that stencil switching is a system — clamp, frame, storage and staging together — and that buying a fast clamp without the matching storage discipline captures only a fraction of the available gain.
The four mounting systems differ along three axes: how many hands are required, how long the mechanical operation takes, and how much the design constrains stencil frame type and print accuracy. A manual clamp — cam levers or bolts — requires the operator to release a set of clamps, lift the frame out, drop the new one in and re-tighten; it is the cheapest to build and, on a well-designed machine, can be fast if the levers are large and well-placed, but it is sensitive to operator technique and repeats its alignment less consistently than a pneumatic or cassette system. A pneumatic clamp replaces the operator's hands with air cylinders, so the frame drops into a cradle and a button or sensor locks it; this removes most of the variance and typically halves the manual time, at the cost of requiring shop air and adding a maintenance item. A magnetic-frame system uses a steel frame that snaps onto a magnetic platen, which is very fast to change but constrains the stencil to magnetic-compatible frames and requires careful attention to frame flatness for fine-pitch work. A cassette or trolley system pre-mounts each stencil in its own carrier that rolls into the machine on rails, so the swap becomes a ninety-second insertion rather than a frame handling job; it is the fastest option and the most expensive, and it only pays back above roughly six changes per shift.
Mounting system | Hands / technique needed | Typical swap time (skilled operator) | Cost and constraint | Best fit |
|---|---|---|---|---|
Manual cam / bolt clamp | Two hands, some technique | 3–9 min | Lowest cost; alignment repeatability depends on operator | Low-frequency HMLV, hybrid lines with 2–4 changes per shift |
Pneumatic clamp | One hand, press to lock | 1.5–4 min | Needs shop air; adds a maintenance item; more repeatable | Job shops with 4–8 changes per shift |
Magnetic-frame system | One hand, snap fit | 1–3 min | Constrains stencil to magnetic frames; frame flatness critical below 0.4 mm pitch | Fast-change lines with moderate pitch mixes |
Cassette / trolley system | Push-in rail, one hand | 0.8–2 min | Highest cost; one carrier per stencil; needs storage rail space | Job shops and NPI houses with 6+ changes per shift |
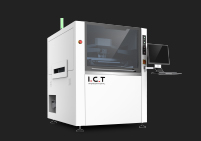
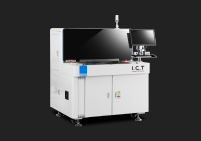
The cost-per-change comparison is what decides between these systems, and it is best done in minutes rather than in purchase price. Take the manual clamp at six minutes and the pneumatic at two and a half; a difference of three and a half minutes per changeover. On a job shop running eight changes a shift, forty-eight weeks a year, five days a week, that is 3.5 × 8 × 5 × 48 = 6,720 minutes, or 112 hours of recovered printer time per year. At any reasonable line-hour value that dwarfs the incremental cost of the pneumatic clamp. But the same arithmetic on a hybrid line running two changes a shift yields only 28 hours a year, which may not justify the additional maintenance burden. The system choice therefore follows directly from the changeover frequency computed in section 1, and a vendor that quotes a fast cassette system to a buyer running two changes a shift is selling capability the buyer will never recover. For a concrete example of a fully automatic machine in this class, the I.C.T 6534 SMT solder paste printing machine is representative of the mid-class automatic printers used as HMLV workhorses, and its specifications are worth reading alongside this table as a reference point.
Most buyers ask vendors for "stencil changeover time" and get back a number measured in a demonstration cell under ideal conditions — the stencil already unbolted, the operator already standing at the machine, the paste already drained, the alignment already re-learned. Those conditions never hold on a real floor, so the number is close to meaningless. A defensible changeover specification describes the whole operation, and the buyer should insist on five components: (1) the stencil release and refit time with the machine in its normal stoppage state; (2) the paste drain and refill time, or at least the design provisions that make it fast, such as a paste-capture tray and a squeegee head that parks in a drain position; (3) the board-support change time for a meaningfully different board outline, not just a different board within the same outline; (4) the recipe recall path and how many keystrokes or how much engineer involvement it requires; and (5) the alignment re-learn time for a new stencil, including how many fiducials the system needs to establish a lock on unfamiliar artwork.
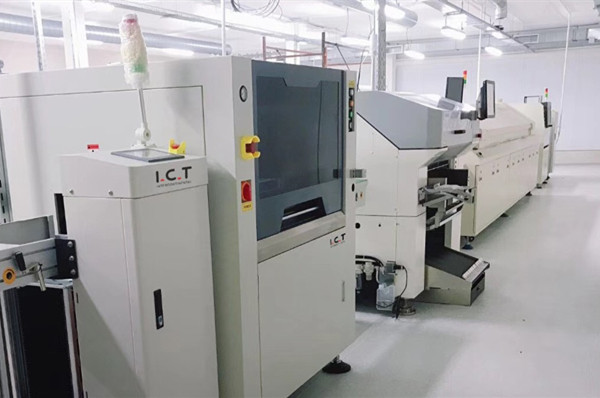
The fifth component is the one buyers most often forget, and it is frequently the largest surprise. A printer that re-learns alignment quickly on a familiar fiducial pattern can still take one to two minutes on a new product's artwork, because the vision system has to search a larger area, reject surface features that resemble fiducials, and establish a stable lock before the first print. Asking a vendor to demonstrate a changeover to a stencil the machine has never seen — not to a stencil stored in its library — reveals this time honestly. The figure below shows a stencil being fitted on a real automatic printer, and the physical moment captured there is the one the specification is really about: the frame in the operator's hands, the clamp open, the print chamber exposed. A vendor demo that skips this moment and shows only a locked, aligned, ready-to-print machine has skipped the part that matters to HMLV.

The clamp is only half of the stencil-switching system; the other half is where the stencils live and how they reach the machine. On an HMLV floor the stencil store is usually the largest source of lost changeover time, because the operator has to walk to a rack, find the right frame among dozens of similar ones, verify it against the job, carry it back and only then begin the mechanical swap. That retrieval-and-verification walk routinely consumes three to six minutes of the changeover and is entirely independent of the printer. The fix is a staging discipline: the stencils for the next two or three jobs are pulled in advance and placed on a trolley beside the machine, each in its own labelled carrier, in the order they will be needed. With that discipline in place, the mechanical swap begins the moment the previous job ends and the retrieval walk disappears from the critical path.
The second half of the discipline is stencil identification. In a plant running dozens of similar frames, the risk of fitting the wrong stencil is real and expensive — a wrong stencil can print an entire batch before SPI catches it. The reliable countermeasures are physical and simple: a durable label on the frame carrying the product code, a barcode or QR code that the printer's recipe system can scan to confirm the match, and a storage layout that groups stencils by product family rather than by acquisition date. Some HMLV printers support a stencil-verification step in the recipe recall — the operator scans the frame and the machine refuses to start if the scanned identifier does not match the recalled recipe. Where that feature exists it is worth more than a marginal improvement in swap speed, because it converts a potential batch-scrap event into a refused start. Reading the storage and staging problem as part of the printer purchase rather than as a separate logistics task is what separates buyers who achieve genuine changeover reductions from those who buy a fast clamp and never see the benefit.
Under-stencil cleaning is the term that appears last in most printer comparisons and costs the most in HMLV operation, for a simple reason: cleaning frequency scales with the number of products and paste types a line runs, not with the number of boards. A high-volume line printing one product on one paste can adopt a long cleaning interval and stay inside its process window, because the paste chemistry and the aperture pattern never change. An HMLV line that runs a fine-pitch product after a coarse one, or switches from a water-soluble paste to a no-clean paste, has to clean far more often — sometimes every few boards — because the residue left by the previous product is a contamination risk for the next. On top of that, each product change itself usually triggers a cleaning cycle or a cleaning-system purge, so cleaning cost compounds with changeover frequency rather than with throughput.
This section treats cleaning as a cost line rather than as a maintenance afterthought. It covers how cleaning cadence should be set from the product mix rather than from operator habit, compares the dry, wet and vacuum sequences in terms of both time and consumables, and examines the second-order effects — paste waste, solvent consumption, paper usage and the downtime of changing cleaning consumables — that rarely appear in a machine comparison but show up clearly in an HMLV cost review. The recurring message is that cleaning on an HMLV line is a design decision about the cleaning system as much as a procedure decision about the interval, and that the two have to be evaluated together.
Cleaning cadence on an HMLV line should be derived from the worst-case product in the mix and then relaxed for easier products, rather than fixed at one value for the whole line. The controlling variables are aperture density and paste type. Dense fine-pitch products with many small apertures load the stencil underside with paste quickly and demand short intervals; coarse products with few large apertures can run much longer before residue matters. A paste that dries fast — many no-clean formulations — forces a shorter interval than a paste with a long open time. The practical method is to run each product at a candidate interval, log the SPI results over a sample of thirty to fifty boards, and tighten the interval only if paste volume, fill consistency or bridge rate starts to drift. That produces a per-product cleaning cadence rather than a line-wide one, and on an HMLV line with a wide mix that can mean the difference between cleaning every four boards on the hardest product and every twenty on the easiest.
The error most HMLV factories make is to set a single conservative interval for the whole line, learned from the hardest product, and then apply it to everything. That wastes time on the easy products and, worse, accustoms operators to a cleaning cycle so frequent that they stop treating it as a quality control point. The reverse error is equally common: carrying over the long interval from a previous high-volume product onto a new fine-pitch one, which produces a spike in bridges and insufficient-paste defects that gets blamed on the stencil rather than on the cadence. Neither error is a printer-purchase problem, but both interact with the printer through the cleaning system's design — a system that can execute a wipe in 1.5 seconds makes a short interval cheap, while a system that takes 6 seconds makes the same interval an expensive proposition and pushes operators to stretch it. That is why cleaning cadence and cleaning-system design must be evaluated together, and why the next subsection treats the cleaning system itself as a selection criterion rather than a fixed feature.
The cleaning system executes a sequence of passes under the stencil: a dry wipe, a solvent or alcohol wet wipe, another dry pass to remove solvent, and optionally a vacuum pass to extract paste residue from the paper or the aperture mouths. Each pass adds time, and each pass consumes a consumable. The three sequences in common use are: dry only, which is fastest and least effective and suits coarse products with high-viscosity paste; wet plus dry, which is the workhorse sequence for most fine-pitch HMLV work; and wet plus dry plus vacuum, which is the most thorough and the slowest and is used for the densest products and the most contamination-sensitive paste chemistries. On a 250 mm stencil the wet plus dry sequence typically runs in two to three seconds and the vacuum sequence in four to six, and on a short cleaning interval those seconds amortise into a meaningful fraction of cycle time.
The consumables picture is equally important on an HMLV line because consumable changes are themselves a downtime event. Cleaning paper is fed through the cleaning head as a roll, and a roll change takes several minutes and stops the line; a factory running aggressive cleaning cadences can consume a roll in a shift or less, turning an apparently minor consumable into a recurring stoppage. Solvent consumption rises with the number of wet passes and with the number of changeover purges. The selection-relevant question is therefore not only "how effective is the cleaning system" but "how cost-effectively does it deliver the required cleaning for my mix" — a system with a large paper roll, a solvent metering design that applies only as much solvent as the wipe needs, and a cleaning head that is quick to service will have a lower total cleaning cost on an HMLV line than a nominally more capable system that consumes paper and solvent faster than the mix requires.

The second-order costs of cleaning are the ones that never make it into a machine comparison and that an HMLV buyer should nonetheless model, because over a year they can exceed the price difference between two candidate printers. The first is paste waste. Every changeover requires the paste on the stencil and in the squeegee path to be recovered or discarded, and every cleaning purge consumes a little more. On a line running eight changes a shift, paste waste from changeovers alone can reach a meaningful fraction of total paste consumption, and a printer whose squeegee and paste-capture design minimises the amount left on the stencil at the end of a run will waste less on every change. The second is solvent and consumable paper, covered above but worth quantifying: multiply the per-wipe paper and solvent consumption by the wipes per shift implied by your cleaning cadence and your product mix, and the annual figure is usually larger than buyers expect.
The third second-order cost is the downtime of cleaning-system service itself — changing paper rolls, refilling solvent reservoirs, replacing wiper blades, clearing clogged vacuum lines. Each of these is a stoppage, and each is more frequent on an HMLV line than on a high-volume one because the cleaning system works harder. The selection-relevant design features are therefore service access and consumable capacity: a cleaning system that can be serviced from the front of the machine without opening the main enclosure, and whose paper roll and solvent reservoir are sized for at least a full shift of aggressive cleaning, will cost less in lost line time than a more compact system that has to be replenished mid-shift. Buyers comparing two printers should ask for the cleaning consumable capacity, the expected service interval, and the access route for service — three questions almost never asked and almost always answered with a number that changes the total cost of ownership picture.
The board support system is the part of an SMT stencil printer for high mix low volume production that distinguishes a machine built for one product from a machine built for many, because it is where the printer makes contact with the only thing that actually changes product by product — the board itself. A high-volume line running one board outline in a single panel format can use a machined support nest cut to that outline, with dedicated locating pins and vacuum channels tuned to the panel. The same machine on an HMLV line that switches board size every shift needs a support system that can be reset without a tool change in the middle of a busy run, or it forces a ten to fifteen minute tooling event into every change. The classic HMLV failure mode is therefore a beautifully engineered single-product support that gives beautiful results on its own board and falls apart as soon as the second product arrives.
This section covers the design dimensions that make a board support usable across mixed sizes: the support envelope and the re-setup cost, the support system's ability to cope with board warpage and bow, and the special handling required for double-sided boards where the bottom-side components become a clearance constraint. The recurring theme is that the support system has to be evaluated against a range of boards, not against a single nominal board, and that the range is wider on HMLV lines than the typical specification assumes. Buyers who skip this step end up with a printer that supports the demo board perfectly and supports the second board badly, and the second product is usually the one they buy the printer to run.
The board-size envelope is the range of board widths, lengths and thicknesses the printer can accept with the support system at its native setting, without any tooling change. A mid-class fully automatic printer typically accepts boards from about 50 × 50 mm up to roughly 400 × 400 mm without retooling, and the support arrangement can be reset for different sizes within that range using top-side support pins and a movable under-board vacuum plate. Outside that envelope, a different set of supports or a different fixture is required, and that is where the re-setup cost hides. The change from one in-envelope board to another — moving three or four support pins and re-clamping — typically takes three to six minutes. The change from an in-envelope board to an out-of-envelope board — fitting a different under-board support, possibly a different vacuum plate, possibly a side-clamp reconfiguration — can take fifteen to twenty minutes and may require a fixture that lives in the support-system library.
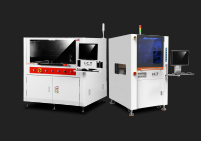
The selection-relevant question is therefore the size of the envelope relative to the actual product mix. A buyer whose products fit entirely inside a single envelope has many options, because every fully automatic in the class will handle them; the decision comes down to support ergonomics, support reset time and the convenience of the under-board vacuum. A buyer whose products straddle a size envelope boundary — small dense boards plus large panels, say — has far fewer options, because the printer must accept both, ideally without a fixture change. This is exactly the position in which long-board-class machines come into their own: the I.C.T 1500 long-board fully automatic LED PCB stencil printer extends the print direction into the 1200 mm range and adds a dual-direction squeegee that keeps the per-stroke time short on long boards, which is the configuration that an LED or signage line running HMLV panels will reach for. The same buyer's small dense boards run well on the same machine, because the support envelope at the lower end is comfortable for almost any fully automatic printer; the constraint on the long-board machine is at the top end of the envelope, not the bottom.
Board warpage is the silent cost on HMLV lines because nobody measures it until it ruins a batch. Boards from different suppliers — and often from different batches of the same supplier — sit in the IPC-6012 warpage tolerance, which permits a reasonable bow for thick boards and an unreasonable bow for thin ones. A printer with vacuum support can flatten most bows within its hold-down capability, but the hold-down vacuum has limits set by stencil clearance, vacuum-pump capacity and the size of the vacuum channels in the support plate. A line running HMLV across multiple board thicknesses is almost guaranteed to encounter a board somewhere outside the easy-to-flatten range, and the printer's reaction to that board — does it print poorly, refuse to start, or alert the operator — is selection-relevant information that a warpage-free demo board will not reveal.
The design features that handle warpage well are vacuum hold-down with adequate pump capacity, magnetic support for thin or flexible boards, and a board-flatness measurement or pre-print camera that lets the machine reject a board whose flatness exceeds the gap it can hold. Without a flatness gate, the system will print onto a board that is bridging in the middle and produce a batch of inconsistent prints whose root cause is mechanical and will be blamed on the paste. On an HMLV line running thin boards — sub-1.6 mm — the support system needs to be evaluated specifically for thin-board behaviour, because the support pins and vacuum channels that work perfectly on a 1.6 mm board can deform a 0.8 mm board during clamping. A vendor demo on a single board thickness is not evidence of warpage handling; a question about the printer's measured behaviour across the buyer's thickness range is.
Bottom-side component clearance is the constraint most often missed on HMLV lines that run double-sided boards, and it interacts directly with the support system. Once components are mounted on the bottom side of a board, the underside is no longer a flat plane that the printer can rest on; the support plate has to land on the components, not the board surface, and the board has to be supported at a height that clears the tallest component. The clearance envelope depends on the stencil-to-pad gap the printer needs for clean separation, the tallest bottom-side component's standoff and the vacuum plate or pin-set geometry. On HMLV lines running a mix of single-sided and double-sided boards, the printer has to support both without a change of fixture, and that often forces a height-adjustable support arrangement.
The selection question is whether the printer has a height-adjustable support and how quickly it can be re-set for a different standoff. A fixed-height support is fine for one product with a known clearance; it is a problem the moment a new product with taller components arrives. A height-adjustable support, often combined with a vacuum channel layout that accommodates a range of board sizes and standoffs, lets the same printer carry both single-sided and double-sided boards without a fixture change. On a job shop running dozens of double-sided products with varying component standoffs, that flexibility is mandatory; on a hybrid line running predominantly single-sided boards with occasional double-sided ones, it can be a feature bought only when the second double-sided product arrives. Reading the buyer's product mix against this dimension, rather than assuming any fully automatic printer will "just handle it", is what avoids a four-figure retrofit a year after purchase.
Recipe management is the unseen multiplier on an HMLV line. On a high-volume line the recipe is written once, refined a few times, and then used unchanged for months; on an HMLV line the recipe library grows, drifts, gets edited by shifts, accumulates variants and eventually diverges from the recipes in the engineering database until nobody trusts it. The wrong machine purchases treat recipe management as a software feature ("the machine supports recipe library, move on"); the right machine purchases treat it as a workflow with measurable cost, where the labour of the engineer maintaining the library, the errors that occur when a printer pulls the wrong variant, and the drift that builds up over time are all known quantities and all subject to choice.
This section covers three aspects of recipe management that have to be evaluated before purchase. It starts with the recipe library structure — what the library looks like, how recipes are named, how parameters are grouped, how variants are distinguished — and shows why a poorly organised library costs more on an HMLV line than a well-organised one regardless of the hardware. It then moves to recipe recall and integration — whether the recipe comes from a barcode scan, a MES call, an operator selection on the touchscreen, or an engineer at a terminal — because the path it takes decides who can change the printer and how often they have to. It finishes with recipe versioning and revision control, the discipline that prevents library drift and that is one of the easiest places to lose real money on an HMLV line.
A recipe on a stencil printer is the set of parameters that tells the machine how to handle a given product: print direction, squeegee speed and pressure, stencil separation timing, alignment positions for each fiducial, cleaning cadence, board support coordinates and paste-related parameters such as print stroke length and the paste ID. On an HMLV line the library can grow to several hundred recipes within a year, and the structure of the library becomes the dominant usability factor. A well-organised library groups parameters into consistent sections, names recipes consistently (product code plus revision), exposes the variants a customer really needs, and hides the parameters that the operator never touches. A poorly organised library lists every parameter on a single flat screen, requires the recipe to be edited for every variant, and grows messy within months. The difference is not a software luxury; it is the difference between an engineer spending an hour a day maintaining the library and an engineer doing it once a week.
A useful evaluation exercise is to ask the vendor for two things: a sample library from a real customer of comparable scale, and the recipe-editing workflow on the operation panel versus on the engineering terminal. Both reveal how much bespoke configuration the buyer will be paying for in the months after installation. Where the engineering work overlaps with the verification work — the recipe has to pass through FAT and SAT before it is loaded for production — the broader question of SMT solder paste printer FAT and SAT checklist documentation becomes relevant, because every recipe parameter should be checkable against the FAT report and every drift should be visible in the SAT record. Treating the recipe library as part of the FAT/SAT envelope rather than as a separate engineering artefact is what keeps the library aligned with the engineering intent over time.
Recipe recall is the moment when the human being at the printer interacts with the recipe library, and it is one of the highest-frequency interactions on an HMLV line. Three recall paths are available. The operator recalls the recipe manually through the touchscreen, which is the lowest-cost option but the slowest and the most error-prone under time pressure. The operator scans a barcode on the job traveller and the printer pulls the recipe automatically, which is faster and more reliable but requires the printer to be integrated with a local recipe server and the job travellers to be reliably barcoded. The MES pulls the recipe into the printer in advance of the board arriving, so the recipe is already loaded when the operator calls the start, which is the most reliable and the most expensive to implement. The right answer depends on the line's MES maturity, the stability of the recipe library and the cost of the wrong recipe being loaded.
The lowest-cost path that works — that is the right way to phrase the choice — is rarely the same as the lowest-cost option in the catalogue. On a job shop with a low MES maturity and a small engineering team, manual recall with clear recipe naming and a barcode-checked operator selection is often the right first step, with MES integration deferred until recipe discipline is established. On an NPI house running fast-changing products, MES-driven recall is worth the integration cost because the recipes change often enough that a manual recall introduces a real error rate. On a hybrid line, barcode recall is usually sufficient because the recipe library is smaller and the recipes change less often. Buyers should evaluate the integration question with their IT team as much as with the vendor, because the integration cost is real, recurring, and tends to be larger than its upfront quote suggests.
Recipe drift is the slow failure mode of any HMLV recipe library that does not have a versioning discipline. Over months, recipes get edited by various shifts for various reasons — a paste change, a stencil rework, a print-quality fix — and the edits accumulate as variants in the library without a clear sense of which variant is current. By the time somebody notices the drift, the library may have four copies of the "same" recipe, each modified slightly differently by a different engineer, and the printer may be running on a recipe that diverges from the engineering intent by enough that the prints are subtly wrong but not detectably so. The cost of drift is the cost of inconsistency: yield variation, paste-volume noise, scrap that cannot be traced to a specific root cause, and the engineering hours spent chasing prints that pass on the printer but fail in the line.
The mitigation is structural rather than procedural, which is why it is a printer selection question. A recipe library should support a parameter baseline — a recipe that records the engineering-intent values — and a per-product set of overrides on top of that baseline, so that a change to the baseline automatically propagates to the dependent recipes unless explicitly excluded. It should support an export and import mechanism that lets the engineering team move recipes between the printer, the FAT/SAT database and a source-of-truth system without manual re-entry. It should support recipe naming that ties the recipe to the engineering document — product code plus revision — so that operator recall cannot accidentally pick a superseded recipe. None of these features is exotic; together they form the difference between a recipe library that the engineering team trusts for years and one that becomes a liability within a year.
Recipe feature | Why it matters on HMLV | What to test |
|---|---|---|
Parameter baseline with per-product overrides | Engineering edits to a baseline propagate automatically; reduces drift | Edit a baseline parameter on a sample recipe and verify all dependent recipes reflect the change |
Recipe naming tied to engineering document | Operators cannot recall a superseded recipe by accident | Import a recipe whose name collides with an existing one and verify the system flags it |
Export / import workflow | Recipes can be moved between printer, FAT/SAT and source-of-truth systems without re-entry | Export a recipe, edit it externally, and import it back without manual keyboard re-entry |
Access control by user role | Operators can recall but not edit, engineers can edit but not bypass review | Log in as an operator and verify the recipe-edit menu is hidden; verify engineer edits are logged |
Audit log of recipe changes | Every edit is attributable to a user and a timestamp; drift can be reconstructed | Make a recipe edit, log out, log in again, and verify the edit is in the audit log with user and timestamp |
Recipe dry-run / simulate | Engineers can verify a recipe change without printing production boards | Edit a recipe, run the simulate mode, and verify the printer cycles through the recipe without consuming paste or triggering the SPI reject |
A buyer who insists on these features during the evaluation phase ends up with a recipe library that can be defended in a customer audit; a buyer who treats the recipe library as a given ends up rebuilding it from scratch within two years. The table above is also an internal checklist for any HMLV engineering team even after a printer has been installed: the right time to check each row is before the printer accepts its first production board, because retrofitting these features later is many times more expensive than having them from the start.
The first ninety days after commissioning a new printer on an HMLV line almost always reveal the same pattern: the machine performs as specified in the demonstration, the first product runs beautifully, and then the second and third products begin to slip against the plan. The slip is rarely mechanical. It is almost always a workflow failure — the operator cannot find the right recipe fast enough, the board-support change takes longer than estimated because the tooling is not pre-staged, the cleaning consumables run out mid-shift, or the shift handover loses the context of what has been changed. These failures are invisible in a machine specification and are the largest single determinant of whether the printer actually delivers its theoretical changeover benefit in production.
This section treats operator workflow as a first-class selection criterion, because on an HMLV line the operator is at the machine many times per shift and their efficiency compounds. It covers the design of the operator interface with an emphasis on depth rather than features, the error budget that an HMLV changeover implicitly carries and how printer design can reduce it, and the training and handover arrangements that keep the workflow stable across shifts. The through-line is that an HMLV printer should be evaluated as much for how it behaves in the hands of an average operator under time pressure as for how it performs when demonstrated by a vendor engineer with unlimited time.
The operator panel on an HMLV printer is used dozens of times a shift, and its most important property is not the number of features it exposes but the depth of the menu tree: how many taps are required to reach the actions the operator performs most often, and how many of those taps can go wrong. The high-frequency actions on an HMLV line are recalling a recipe, initiating a cleaning cycle, acknowledging or resetting after a stop, adjusting a parameter within limits, and confirming a first-article print. A printer whose panel requires four or five levels of navigation to recall a recipe, or which hides the cleaning control under a maintenance menu, will slow every changeover by a small amount that compounds into a large daily cost. A printer whose panel exposes those five actions on a shallow, predictable layout lets an average operator hold the whole workflow in their head and execute it quickly.
The comparison to make during evaluation is behavioural, not feature-checklist. Ask the vendor to hand the panel to an operator who has never used the machine and time how long it takes them to recall a new recipe, run a cleaning cycle and reset after a simulated stop. A panel that exposes these actions on the first screen will show a training time measured in minutes; one that hides them in nested menus will show a training time measured in hours. The semi-automatic class deserves a specific mention here, because on a semi-automatic machine the operator is the machine's motion system and the panel design is even more influential: the I.C.T P6 semi-automatic solder paste printer is representative of the class used in low-volume HMLV production where a single operator runs the print cycle by hand, and on that machine the panel's shallow layout and physical control placement determine the achievable cycle time far more than any software feature. On a fully automatic machine, the panel matters less for cycle time and more for changeover speed and error avoidance.
Every HMLV changeover carries an implicit error budget: the set of mistakes an operator can make during a changeover that will not be caught until the batch is in trouble. The common members of this set are recalling the wrong recipe, fitting the wrong stencil, using the wrong paste (a paste left over from the previous product), setting the wrong support height, skipping the cleaning purge, and failing to re-verify the first article. None of these is exotic, and each of them is more likely when the operator is under time pressure — which is precisely the normal condition on an HMLV line. The printer's design can meaningfully shrink the error budget, and a buyer should evaluate the machine on its ability to do so. Barcode-verified stencil identification, recipe recall tied to the board's job traveller, a paste-ID gate in the recipe, an automated support-height calculation from the recipe's board thickness, a mandatory cleaning-purge confirmation after a changeover, and a first-article gate that blocks production until the print has been verified — each removes one item from the budget, and taken together they can remove most of it.
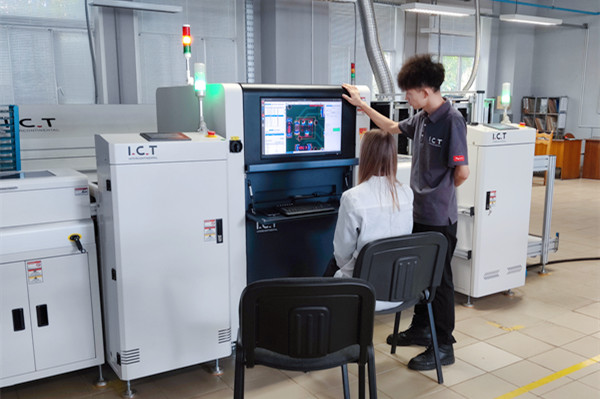
The value of this reduction is easy to underestimate in a demonstration and easy to overestimate later, so it is worth quantifying against the buyer's own scrap history. If a job shop typically loses one batch per month to a wrong-recipe or wrong-stencil event, and a batch is worth a few thousand dollars in materials and labour, the annual loss is in the tens of thousands — which is well above the incremental cost of a printer with proper recipe and stencil verification. The figure below shows an operator at a printer's control panel with a barcode scanner aimed at the job traveller, and that barcode check is the single most cost-effective error-budget reduction available: it converts a class of silent mistakes into a refused start. On an HMLV line, that refusal is worth more than any marginal improvement in print quality.

Shift handover is a workflow problem with an outsized effect on HMLV lines, because the context of a changeover — which recipe is loaded, which stencil is fitted, which support height is set, what the first-article result was, and what is pending — is partly in the machine and partly in the operator's head. If the handover does not transfer that context, the incoming operator re-verifies everything from scratch, adding minutes to the first changeover of every shift, or worse, assumes the state is correct and runs a batch on wrong settings. The printer's design can make the handover easier by displaying the current recipe and its revision, the stencil identified in the machine, the support configuration and the status of the cleaning system on a single panel that the outgoing operator can walk the incoming one through. Printers that log these states and let the incoming shift recall them are materially easier to hand over than printers that hide them under menus.
Training is the other half of shift continuity, and on an HMLV line its scope is broader than on a high-volume line because operators have to handle more distinct products and more changeovers. The training content that matters most is not how to press the buttons — that takes an afternoon — but how to recognise the situations that require stopping and asking, such as a board that will not align, a paste whose behaviour looks different from usual, or an SPI reading that is drifting in a direction the operator has not seen before. Experienced operators on HMLV lines develop exactly these instincts, and the printer's design either supports them, by surfacing the information that triggers the instinct, or suppresses them, by hiding the data. A well-designed HMLV printer shows the operator enough of what is happening — alignment residuals, print-force readings, cleaning status, recipe revision — that these instincts can form, and a poorly designed one shows nothing but a start button.
The previous seven sections have covered the mechanics one at a time. This final section pulls them together into a decision table that a buyer can use in a meeting with a vendor in a single sitting, and it is deliberately ordered so that the highest-weight criteria come first. The table starts by matching eight buyer profiles to printer classes, then lists the three mistakes that most often convert a reasonable printer choice into a chronic line stoppage, and finishes with a twenty-eight-row pre-purchase checklist that the buyer can carry into the evaluation and tick off as each item is confirmed or deferred. Read end to end, this section is a complete HMLV printer selection procedure in about fifteen minutes of reading and one afternoon of application.
One caution before the tables: a decision table is a map, not a substitute for the survey. The tables are only useful if the buyer has already computed the changeover duty cycle from section 1, measured the eight changeover terms from section 2 and identified the sub-profile from section 1.3, because the tables key off those outputs. A buyer who skips the survey and goes straight to the table will find the table unhelpful — every row will look plausible — and will end up choosing on price or on the vendor's demo, which is exactly what this guide has been arguing against. The tables are meant to convert an accurate self-assessment into a shortlist, not to make the assessment unnecessary.
The eight profiles below span the realistic HMLV space, from a one-machine job shop to a hybrid line with an existing MES. For each profile the table gives the dominant constraint, the printer class that best fits and the single specification that should be used as the tie-breaker between candidates. The classes referenced are the semi-automatic class, the mid-class fully automatic inline class and the long-board fully automatic class, with representative machines named for illustration. A buyer should find their profile, read the dominant constraint, and then use the tie-breaker as the first question in every vendor conversation.
HMLV buyer profile | Dominant constraint | Best-fit class | Tie-breaker specification |
|---|---|---|---|
Single-machine job shop, low volume, many customers | Changeover speed, board-size variety | Semi-auto, e.g. I.C.T P6 semi-automatic solder paste printer class | Operator panel depth and physical control layout |
Job shop with two to three machines, 30–80 SKUs | Stencil swap and support reset | Mid-class fully automatic, e.g. I.C.T 6534 SMT solder paste printing machine class | Stencil clamp type and support re-set time |
NPI house transferring products to volume | Recipe discipline and print-data logging | Mid-class fully automatic with strong recipe management | Recipe versioning and dry-run capability |
Hybrid line, stable mix plus new-product runs | Balance of changeover and print quality | Mid-class fully automatic inline | Cleaning-system service access and capacity |
LED / signage line running long panels in small batches | Print-direction length and panel handling | Long-board fully automatic, e.g. I.C.T 1500 long-board fully automatic LED PCB stencil printer | Support envelope at both ends of the panel range |
Mixed single- and double-sided boards with tall bottom-side parts | Bottom-side clearance and support height | Fully automatic with height-adjustable support | Support height adjust range and reset time |
Line with an existing MES and barcoded travellers | Integration and auto-recall | Fully automatic with recipe-server interface | MES interface openness and recipe-recall latency |
Contract manufacturer running 200+ SKUs per month | Changeover frequency and error budget | Fully automatic with cassette stencil system and verification | Stencil-verification gate and audit logging |
Two observations about the table are worth stating explicitly. First, the mid-class fully automatic printer appears in four of the eight rows, which is why it is the default HMLV workhorse: it is the class that can be configured for a wide range of profiles without extreme cost in any one dimension. Second, the semi-automatic class appears only in one row — the very smallest operation — because the operator-as-motion-system model that suits a one-machine shop becomes a throughput liability once a shop has more than one printer or more than a few changes a shift. Buyers at the boundary between the semi-automatic and fully automatic classes should compute the value of the changeover time saved per shift and compare it against the price difference; on most HMLV lines the fully automatic class wins the comparison above roughly four changeovers per shift.
The first mistake is choosing on datasheet cycle time. An HMLV buyer who compares two printers on their advertised cycle time and picks the faster one has optimised a number that contributes almost nothing to daily output in a low-volume regime while ignoring the changeover and setup terms that contribute almost everything. The corrective is to compare printers on changeover time first, and to treat cycle time as a tie-breaker only after changeover, support and recipe management are equal. Our separate guide on how to estimate solder paste printer cycle time and throughput explains how to convert a datasheet cycle time into a realistic production figure, and reading it before a printer comparison prevents the most common of the three mistakes.
The second mistake is buying for the demo board. Every printer in the class will run a clean, flat, single-size demo board beautifully, so a demonstration on such a board carries almost no information about HMLV performance. The corrective is to bring the buyer's own worst board — the smallest, the thinnest, the most warped, the densest, the one with the tallest bottom-side components — and, ideally, to bring the stencil for it and ask the vendor to change over to it from a different job. The third mistake is treating the printer as a standalone purchase rather than as the centre of a changeover system. The stencil store, the board-support tooling, the recipe library, the operator training and the MES integration are all part of the system, and a buyer who buys only the printer and leaves those to chance will find that the printer under-performs its potential in exactly the way this guide has described. The corrective is to budget for, and plan, the surrounding system as part of the printer project, and to hold the vendor to it in the acceptance criteria.
The checklist below is the practical output of this guide. It is organised in seven groups of four, covering the changeover survey, the stencil system, the cleaning system, the support system, the recipe system, the operator workflow and the commercial terms. Each row is a question the buyer should be able to answer with evidence, not with a vendor's assertion, before signing the purchase order. Items that cannot be answered from the vendor's own materials during the evaluation should be carried into a formal acceptance test, and a sentence covering them should appear in the contract; the SMT solder paste printer buying checklist provides the wider procurement framework into which this HMLV-specific list nests.
# | Group | Question to confirm before signing |
|---|---|---|
1 | Changeover survey | Have you measured your changeover duty cycle in % of available printer time? |
2 | Changeover survey | Have you timed all eight changeover terms (paste drain, stencil, support, recipe, purge, alignment, first-article, waiting)? |
3 | Changeover survey | Do you know which of the eight terms the printer can address and which remain yours to fix? |
4 | Changeover survey | Have you identified your sub-profile (job shop, NPI house or hybrid) and the resulting priority order? |
5 | Stencil system | What is the stencil release-and-refit time with the machine in normal stoppage state? |
6 | Stencil system | Does the clamp design match your changeover frequency (manual / pneumatic / magnetic / cassette)? |
7 | Stencil system | How is the stencil identified, and does the printer support a verification gate before start? |
8 | Stencil system | Is there a staging arrangement (trolley, rail, carrier) that keeps the next jobs' stencils at the machine? |
9 | Cleaning system | What is the time per wipe for the dry / wet / vacuum sequences the mix requires? |
10 | Cleaning system | What is the cleaning paper roll capacity, and how often will it need changing on your mix? |
11 | Cleaning system | How is solvent consumed and metered, and what is the annual solvent consumption estimate? |
12 | Cleaning system | Can the cleaning system be serviced from the front without opening the main enclosure? |
13 | Support system | What is the board-size envelope with the support system at its native setting? |
14 | Support system | How long does a support re-set take for a board of a different outline within the envelope? |
15 | Support system | What is the vacuum hold-down capacity, and how much board bow can it flatten at your thinnest board? |
16 | Support system | Is the support height adjustable, and by how much, for double-sided boards with tall bottom-side parts? |
17 | Recipe system | Does the recipe library support a parameter baseline with per-product overrides? |
18 | Recipe system | Can recipes be exported and imported without manual re-entry at the panel? |
19 | Recipe system | Is there role-based access control, and is every recipe edit logged with user and timestamp? |
20 | Recipe system | Does the printer support barcode or MES-driven recipe recall, and at what latency? |
21 | Operator workflow | How many taps to recall a recipe, start a cleaning cycle and reset after a stop? |
22 | Operator workflow | How long does a first-time operator take to perform those three actions without help? |
23 | Operator workflow | Which error-budget items does the machine gate (wrong stencil, wrong recipe, wrong paste, skip purge)? |
24 | Operator workflow | Does the panel display recipe revision, identified stencil, support config and cleaning status for handover? |
25 | Commercial terms | Is the changeover time you were quoted measured on a stencil the machine has never seen? |
26 | Commercial terms | Are the changeover, cleaning and support numbers part of the acceptance test, not just the brochure? |
27 | Commercial terms | What is included in the training scope, and how many days on site after commissioning? |
28 | Commercial terms | Are the stencil carriers, support tooling and recipe-server interface quoted, or treated as extras? |
Twenty-eight rows is a lot to confirm, and no HMLV buyer will answer every one of them perfectly before signing. The value of the list is not that every item is a gate, but that the buyer has asked every question and knows which ones remain open. The items still open at signature become the acceptance-test agenda, and writing them into the contract is the difference between a printer that arrives performing to spec and a printer that becomes a two-year argument. Buyers who run this list before signing consistently report that it shortens the evaluation phase — because it forces the comparison onto a common set of questions — and that it catches the one or two items whose omission would otherwise have been discovered only after commissioning.
Talk to an I.C.T high-mix low-volume application engineer
If you are selecting an SMT stencil printer for high mix low volume production and would like a second opinion on the changeover load, the stencil-switching system and the board-support envelope for your actual product mix, send us your SKU count, average batch size, changeovers per shift, your widest and narrowest board outlines, your thinnest and thickest board, and the tallest bottom-side component you have to clear. We will come back with a worked changeover-load breakdown in the same eight-term format as section 2.2, a shortlist of printer configurations that fit the mix, and — where relevant — a note on which of the eight changeover terms the printer can remove and which remain an internal workflow decision.
The I.C.T range covers the semi-automatic class for the smallest job shops, the mid-class fully automatic inline class that is the HMLV workhorse, and the long-board fully automatic class for LED, signage and large-panel work, together with the matching stencil-cleaning machines and post-print inspection stations. To see the full family on common reference boards, start at the I.C.T solder paste printer product hub. The procurement review that sits around this guide is the SMT solder paste printer buying checklist, which packs nine review items into twenty-eight questions, and every new machine should be signed off against the SMT solder paste printer FAT and SAT checklist before it prints a real production shift.
What to send: SKU count and average batch size, changeovers per shift, board outline envelope, thickness range, densest package pitch, and your target changeover time. Reply is typically within one business day.
A printer suited to HMLV production is one whose changeover mechanics are as well designed as its print quality, because on an HMLV line the line spends a large fraction of its time changing over rather than printing. The five mechanics that decide suitability are: the stencil mounting system (a pneumatic, magnetic or cassette clamp that a single operator can swap quickly and repeatably), the under-stencil cleaning system (which must deliver the required cleaning cadence quickly and consume paper and solvent economically), the board-support system (which must accept a wide board-size and thickness range with a fast reset rather than a fixture change), the recipe-management system (which must let an operator recall the right recipe reliably and let an engineer keep the library from drifting), and the operator interface (which must be shallow enough that an average operator can perform the high-frequency actions quickly under time pressure). An SMT stencil printer for high mix low volume production is therefore evaluated on changeover time, support flexibility and recipe discipline first, and on datasheet cycle time last.
The break-even is around four changeovers per shift for most HMLV lines, though it depends on batch size and board complexity as much as on the count. A semi-automatic printer relies on the operator for motion, clamping and much of the cycle, so its effective changeover and per-board times are longer and less consistent than a fully automatic machine's. Below about four changes a shift, the productivity difference is small enough that the lower capital cost of the semi-automatic class usually wins; above it, the recovered time compounds and the fully automatic class pays back quickly. The honest way to check the break-even for a specific line is to compute the changeover time saved per shift, multiply it by the number of shifts, and compare the annual recovered line-hours against the price difference between the two classes. On a job shop running eight changes a shift the arithmetic almost always favours the fully automatic class; on a hybrid line running two, it often does not.
A well-run changeover on an HMLV line — including paste drain, stencil swap, board-support change, recipe recall and first-article verification, but excluding waiting for tooling that should have been pre-staged — should take roughly ten to eighteen minutes on a mid-class fully automatic printer. The mechanical part (stencil swap plus support reset) should account for about half of that, or five to nine minutes, and the remaining time is paste handling, recipe recall and verification. A changeover that consistently exceeds twenty minutes on a modern fully automatic machine is usually not a machine limitation but a workflow one: the stencil is not staged, the support tooling is not pre-built, or the recipe cannot be recalled at the machine and waits for an engineer. Measuring the eight terms separately, as in section 2.2, is the only reliable way to find which of those is happening, because the total alone hides where the minutes went.
Yes, and on an HMLV line it is the product mix rather than the throughput that sets the cleaning cadence. Cleaning frequency is driven by aperture density and paste chemistry: a dense fine-pitch product loads the stencil underside quickly and needs short intervals, while a coarse product can run much longer before residue matters, and a paste with a short open time forces shorter intervals than a paste with a long one. The practical consequence is that a single line-wide cleaning interval is almost always wrong for part of the mix — too aggressive for the easy products and too lax for the hard ones. The reliable method is to set the interval per product by logging SPI results over a sample run and tightening only when paste volume, fill consistency or bridge rate starts to drift. A printer whose cleaning system executes a wipe quickly makes a short interval affordable, which is why cleaning-system speed and cleaning cadence have to be evaluated together.
Not on day one, and not on every HMLV line. MES-driven recipe recall is the most reliable option and the most expensive to implement, and it is worth it when the recipe library is large, changes often, and the cost of loading the wrong recipe is high — which describes an NPI house or a contract manufacturer with hundreds of SKUs. For a smaller job shop or a hybrid line with a stable mix, barcode-based recall (the operator scans the job traveller and the printer pulls the recipe) captures most of the reliability benefit at a fraction of the integration cost. The lowest-cost path that actually works is the right choice: manual recall with disciplined naming and a barcode verification step is a sound first step, with MES integration deferred until recipe discipline is established and the library is stable. Attempting MES integration before the recipe library is clean usually automates the drift rather than preventing it.
Start by mapping your actual product mix against the printer's native board-size envelope — the range of widths, lengths and thicknesses it accepts without any tooling change. For a mid-class fully automatic printer that is typically about 50 × 50 mm up to roughly 400 × 400 mm, which covers a large share of HMLV work. Products inside the envelope are handled by adjusting support pins and the under-board vacuum plate, which takes a few minutes; products outside it need a different support or fixture, which takes much longer and should be kept to a minimum by choosing an envelope that covers the whole mix. For thickness variation, the critical question is how much board bow the vacuum hold-down can flatten at your thinnest board, and whether the support height is adjustable for double-sided boards with tall bottom-side components. A printer whose envelope and support adjustability cover the entire mix, without fixture changes, is worth more on an HMLV line than one with a narrower envelope and better headline specifications.
Partly, and the cost depends on how the printer was built. Recipe versioning, baseline-with-overrides and audit logging are software features, and they can sometimes be retrofitted by a firmware or software update if the printer's controller supports them — but this is a vendor-specific question and is often more limited than buyers expect, because the underlying data model may not have been designed for it. Stencil verification is usually easier to retrofit externally, with a barcode scanner and a manual confirmation step, if the printer exposes a start-inhibit input or an operator-confirmation prompt; tighter integration requires an interface the printer may not have. The general rule is that retrofitting is many times more expensive than specifying these features at purchase, which is why section 6 argues for treating the recipe system as part of the initial specification. A buyer who already owns a printer and wants these features should ask the vendor directly what is supported, and assume the answer is less than hoped until proven otherwise.
The single biggest mistake is choosing on datasheet cycle time — comparing two printers on their advertised print cycle and picking the faster one. On an HMLV line, cycle time contributes almost nothing to daily output, because the line only runs a few boards between changes; what determines output is the changeover and setup terms, and those are almost entirely absent from the datasheet. A buyer who selects on cycle time systematically buys the machine optimised for a problem they do not have and neglects the mechanics they do need: stencil swap, board-support reset, cleaning cadence, recipe discipline and operator workflow. The corrective is to compute the changeover duty cycle first (section 1.1), measure the eight changeover terms (section 2.2), and only then compare machines on changeover convenience, support flexibility and recipe management — treating cycle time as a tie-breaker at the very end. Buyers who make this switch in evaluation order consistently report choosing a different machine than they would have otherwise.