English
Views: 0 Author: Vinci Zhang Publish Time: 2026-10-13 Origin: Site


Solder balls are small spheres of solder scattered on the board around a joint, often sitting on the solder mask where they do not belong. They are one of the most common defects you will pull off a reflow line, and one of the most misunderstood, because the same visible symptom can come from five different upstream conditions. This article walks through what solder balls really are, the five cause families that produce them, how the reflow profile and the printing process each contribute, and a practical routine for finding and fixing the right one on your line. Every claim here stays inside what process engineering actually supports — no invented rates, no invented counts, no numbers pulled from thin air.
If you want the broader diagnostic method this article plugs into, the complete guide to reflow soldering defects explains how to classify a defect before you change anything. The companion catalogue of common reflow soldering defects places solder balls in the print-and-paste family. If your scattered solder shows up as parts drifting rather than as discrete balls, the piece on why components float during reflow may be the more relevant read.

Solder balls matter because they are a latent short-circuit risk, not just a cosmetic blemish. A loose sphere sitting on the solder mask can move during later handling, rework, or field vibration and bridge two conductors that were never meant to touch. The first job is to recognize the defect correctly, because the right response depends entirely on which kind of ball you are looking at.
A solder ball is a discrete sphere of solder alloy that has separated from the intended joint and landed somewhere on the board surface, most often on the solder mask. Not every small sphere is a defect. Some fine, low-mass spheres sit near a fillet as a normal by-product of wetting and pose no risk. The ones that matter are loose, large enough to bridge, or sitting where they can later migrate. The acceptance question is answered by fillet geometry and wetting behavior in the acceptability standards, not by counting every sphere by eye.
Balls cluster in predictable places, and the location is itself a clue. Balls beside a chip component often come from paste squeezed out during placement. Balls scattered broadly across the board, including between components, usually point to spatter driven by the profile or by paste outgassing. Balls sitting only under one area of the panel can point to a local thermal or print condition rather than a global one.
The terms get used loosely, and the loose usage causes wrong fixes. Spatter is the mechanism — paste flecks blown off the deposit when flux volatilizes too violently — and the visible result is often a scatter of balls. Beading is a cluster of small balls trapped beside a component body, usually a chip part, and often points to placement pressure displacing paste. Solder balls is the general name for the loose spheres themselves.
The danger of a loose ball is not that it looks bad. The danger is that it is a free conductor. During in-circuit test, depaneling, conformal coating, or field vibration, a sphere can roll or be pushed until it spans two exposed conductors. That is a hard failure to reproduce and a worse one to explain to a customer, because the board left your line looking fine.
There are five cause families that produce solder balls during reflow, and staying inside this list keeps you from inventing causes the process cannot support. They are flux spatter during heating, too-fast ramp rate, paste outgassing from absorbed moisture, a dirty stencil bottom from insufficient wiping, and placement pressure that squeezes paste outside the solder mask. Everything else you might hear about balls tends to reduce to one of these five.
Flux spatter happens when the flux inside the paste volatilizes faster than the solder powder can coalesce, throwing tiny flecks of paste off the deposit. Those flecks land on the board, melt separately, and form balls. The trigger is heat arriving at the deposit before the flux has done its job gently. A profile that drives the flux off too hard, or a flux chemistry that is too aggressive for the ramp being used, both push toward spatter.
A ramp rate that is too fast is the single most common profile cause of balls. When the assembly is heated too quickly in preheat, the volatile fraction of the flux flashes off instead of leaving gradually, and the paste erupts locally. The fix is almost always to slow the rise in temperature during preheat rather than to chase the peak.
Paste that has picked up moisture behaves like paste with extra volatiles waiting to boil. During heating, that absorbed water turns to vapor and drives the same eruptive spatter as an aggressive flux, only the source is the paste itself rather than the flux chemistry. Moisture pickup happens when paste is left open too long, stored poorly, or run in a high-humidity environment.
A stencil bottom that is not wiped clean leaves a film of paste on the board surface away from the pads. When that stray paste melts, it forms balls sitting on the solder mask where no joint was ever intended. This is a print defect that only becomes visible after reflow, and it is one of the easier ones to confirm: look at the stencil underside and at the board right after printing, before the oven ever sees it.
Placement pressure that is too high squeezes paste out from under the component, past the edge of the solder mask, where it melts into balls beside the pad. This is a movement-and-print interaction: the deposit may have been fine, but the act of pressing the part down displaced it. The balls show up beside the component body, which is the tell that distinguishes this family from profile-driven spatter.

The reflow profile is where three of the five cause families meet the heat. Flux spatter, too-fast ramp, and moisture outgassing all express themselves through how temperature is applied over time. Understanding the four stages and where each one can go wrong is what lets you tune the profile instead of guessing at it.
Reflow has four functional stages: preheat, soak (thermal equalization), reflow above liquidus, and cooling. Spatter belongs almost entirely to the preheat and early soak window, where volatiles are driven off. The reflow stage above liquidus forms the joint; the cooling stage sets the grain structure. A ball problem is rarely a cooling problem and rarely a peak-temperature problem — it is usually an early-stage problem.
Preheat brings the assembly up to temperature without thermal shock and starts the flux working. The ramp rate through this stage decides how gently the flux volatilizes. Too fast, and the volatiles flash; too slow, and you risk paste drying before reflow or an over-long cycle. The ball-forming window is the early, fast part of preheat where flux is most likely to erupt.
Soak equalizes temperature across the board so that large copper areas and small components arrive at reflow together, and it gives the flux time to clean the surfaces. A soak that is too short leaves heavy parts lagging; a soak that is too long or too hot spends the flux before the alloy melts. Either extreme can leave the joint poorly prepared, though balls specifically track more to the preheat violence than to the soak length.
Time above liquidus, often called TAL, controls intermetallic compound growth. Too long thickens the intermetallic layer and coarsens the grain; too short causes cold joints. Balls are not usually a TAL symptom, but an over-long TAL can worsen appearance and make any existing spatter balls harder to reabsorb into the joint. The point is to keep TAL inside the window the paste supplier recommends rather than to use it as a ball fix.
Lead-free SAC alloys, such as SAC305, have a solidus around 217 °C — confirm the exact value with the alloy supplier data sheet — and they wet more slowly than tin-lead, which tightens the window and makes gentle heating more important. The slower wetting means the solder powder stays as separate particles longer, so any spatter has more time to land and freeze as a ball before the joint can pull it back in.

Two of the five cause families — dirty stencil bottom and, indirectly, moisture in paste — are decided at the printer, not the oven. These are the cheapest to fix because the printer is a controllable, measurable machine. The discipline is to confirm the print before you ever blame the profile.
Paste absorbs moisture from the air, and once it has, no oven setting removes the consequence. Sealed storage, a tracked open time, and a clean break between lot changes are the controls. High ambient humidity makes the problem worse, which is why some lines see more balls in certain seasons. A lot that behaves differently from the last one is a signal to check storage, open time, and humidity.
The stencil underside is where stray paste lives. If the wipe schedule is too loose, or skipped during a fast shift, paste builds on the bottom and transfers to the board between apertures. After reflow, that stray paste is balls on the mask. The check is direct: inspect the stencil bottom and the board right after printing, before the oven, and you will see the cause without a profiler.
Aperture design decides how much paste lands on each pad and how cleanly it releases. When the deposit is larger than the solder mask opening can contain, placement pressure has somewhere to push the excess, and that excess becomes balls. The relationship between aperture, pad, and mask is governed by stencil design practice, and getting it right is prevention rather than cure.
Placement pressure that is too high is the direct cause of squeeze-out balls. The component is pressed into the deposit, paste is forced sideways past the mask, and after reflow those side lobes are balls beside the pad. The signature is balls next to a specific component type, not scattered board-wide. Lowering Z-axis force, or confirming the deposit fits the mask, usually removes them.
Open time is the window between printing and reflow, and paste changes across it. Left too long, paste dries and can behave differently under heat; exposed to humidity, it picks up moisture. Both push toward the moisture and spatter families. A firm open-time limit, respected during changeovers and breaks, is the control, and it is one of the most commonly exceeded limits on a busy line.

Diagnosis is where most time is won or lost. The right order — cheap check first, expensive check last — separates a line that fixes balls in minutes from one that changes five settings and learns nothing. The tools are simple: your eyes, the print record, a profiler, and the inspection systems you already run.
Three questions eliminate most possibilities fast. Is the defect repeatable or random? A ball that follows one component position is geometry or print; a wandering ball is drift or material. Did it start suddenly or drift in? Sudden means a change — new paste, new stencil, changed setting; gradual means wear, age, contamination. Is it local or board-wide? Local points to geometry, thermal asymmetry, or handling; board-wide points to profile or paste.
Spatter balls are scattered and often board-wide, driven by the profile or moisture. Displaced-paste balls sit beside a component, driven by placement pressure. The fastest way to tell is to compare the deposit before and after placement: if the printed deposit was clean and balls appeared after the mounter, it is placement. If balls appeared with no placement change, it is profile or paste.
A profile taken with thermocouples on a real assembly, including its heaviest thermal mass, is the reference for any profile claim. Attach the probes, run the board at production settings, and read the actual preheat ramp, soak, peak, and TAL. The most common finding is that the measured profile does not match the oven display or the stored recipe, because recipes drift when conveyor speed changes or a zone heater ages.
Solder paste inspection, or SPI, turns "looks a bit much" into a number you can trend. Paste height and volume data tell you whether the deposit is within the window the stencil was designed for. Without SPI, periodic height checks on a test coupon give most of the same early warning for far less capital. Either way, the print is the first thing to confirm when balls appear beside components.
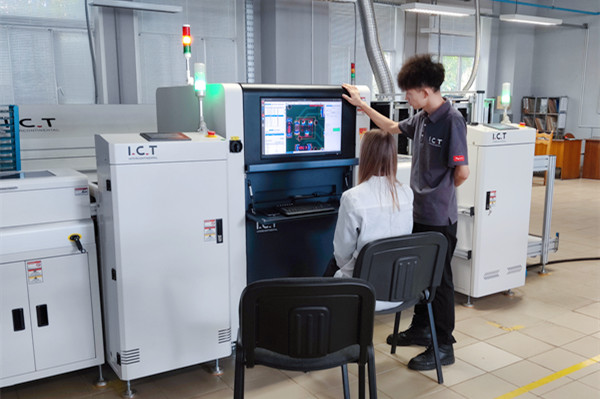
Automated optical inspection catches visible balls; X-ray catches balls and related defects hidden under components or inside area-array packages. Both feed the closed loop: detect, measure, adjust, confirm. For balls specifically, AOI is usually enough on exposed joints. X-ray matters more when balls appear with voiding or with package-level defects, where the same moisture or profile cause may be expressing in two places at once.

The fix has to be narrow, because a change made to stop balls can easily cause bridging, cold joints, or tombstoning if it is the wrong change. The discipline is to fix the confirmed cause and confirm the result with measurement, not with a single good board.
When the profile is the cause, slow the preheat ramp before you touch anything else. A gentler rise lets the flux leave gradually instead of flashing, and it removes the eruptive spatter without changing peak temperature or TAL. The cycle gets slightly longer; the ball rate usually drops sharply. This is the highest-probability single change for board-wide spatter.
When moisture is the cause, the fix lives in storage and handling. Seal the paste, enforce the open-time limit, watch ambient humidity, and run a first-article check on every new lot. None of this requires an oven change, and an oven change will not fix it. The paste handling record is the document that confirms the fix.
When the stencil bottom is the cause, enforce the wipe. Set the schedule to the product and the shift, confirm it is running, and inspect the stencil underside during the shift, not only at setup. The fix is cheap and fast, which is why it is frustrating when it is skipped. A clean stencil bottom removes this family of balls at the source.
When squeeze-out is the cause, lower the placement Z-axis force and confirm the deposit fits the mask. The balls beside the component should fall away as the force comes down. If they do not, the aperture may be depositing more than the mask can hold, and the stencil design needs a look. Pressure and aperture are the two levers here.
Whatever the cause, change one variable, run a controlled set of boards, and confirm with measurement. Changing the ramp, the paste, and the stencil together hides the cause instead of finding it, and the balls come back later with no lesson learned. Confirmation means reproducibility across a full shift, not one good board.
Fixing a ball is half the job; building a process that produces fewer of them is the other half. The controls are statistical, routine, and equipment-level, and they are what keep a fix from dissolving at the next shift change.
Statistical process control on paste thickness, placement accuracy, and the oven profile is what surfaces drift before it becomes defects. The readings have to be taken at the same points and recorded the same way, then watched for trend rather than for a threshold. A slow drift in paste volume over weeks is the kind of signal a pass-fail limit misses and SPC catches.
First-article verification and a disciplined changeover check stop balls at the moment a new product, new paste, or new stencil enters the line. A first article confirms the deposit, the placement, and the profile before full release. A changeover check confirms the recipe loaded is the recipe intended, because a misloaded recipe is a quiet, expensive source of balls and other defects.
Profiling should be a routine, not a fire drill. A documented baseline profile for each product, taken on a real board, is the reference every later investigation compares against. Without it, you cannot tell a fix from a coincidence, because you have nothing to compare the current trace to. The profiler itself needs calibration, because an out-of-calibration profiler gives a confident wrong answer.
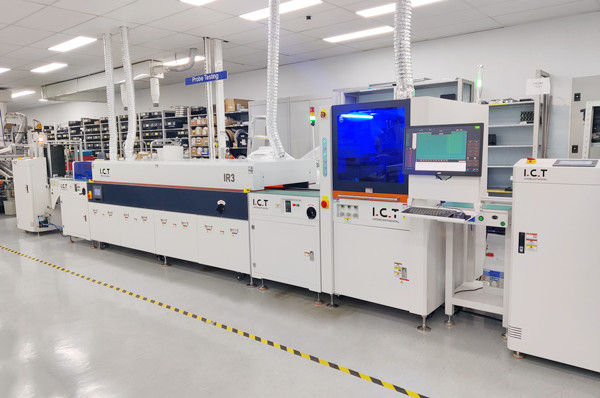
Equipment shapes which defects you fight. A machine with more heating zones and better zoning control gives a wider process window, which matters most for lead-free alloys, heavy copper, and mixed assemblies where the profile has to satisfy parts with very different thermal masses. More zones let you shape a gentle preheat instead of a single aggressive rise, directly reducing the spatter family of balls. For a view of how configurations are typically positioned, our overview of SMT reflow oven solutions groups them by application and process window.
Atmosphere influences oxidation during the molten window. Running under nitrogen reduces oxygen availability, which typically improves wetting and widens the process window for lead-free alloys that wet slowly and are oxidation-sensitive. Whether that benefit justifies the gas cost depends on the product, the finish, and the defect data, so it is a decision made against your own numbers rather than a default. Nitrogen will not fix a starved deposit or a dirty stencil.
Solder balls rarely travel alone. They often sit beside other defects or signal an upstream condition that will show up elsewhere next. Knowing when balls are a symptom of something larger keeps you from celebrating a local fix while the real problem waits downstream.
Balls and bridging share a root in paste volume, which is why they appear together on a line with deposit problems. Too much paste can ball on one component and bridge on another. Floating parts, covered in our article on why components float during reflow, share the paste-volume lever too: generous deposits that ball can also let light parts drift. The article on preventing solder bridging works through the volume and aperture side in depth.
Balls from moisture are rarely the only moisture symptom. The same absorbed water that drives spatter can drive voids, delamination, and in severe cases package cracking. Moisture-sensitive components are classified and handled per a defined method, and the classification and bake procedure is set out by the IPC/JEDEC J-STD-020 standard, which you can reference at JEDEC. Baking before assembly, per the component's moisture sensitivity level, is the standard control and one of the most commonly skipped under pressure.
Board condition connects to balls through moisture and through heat balance. A board that has absorbed moisture spits vapor during reflow; a board with uneven copper heats unevenly and can localize spatter on one area. Warpage changes the contact between deposit and component and can shift effective paste volume. None of these are fixed by the peak temperature.
A short defect log — date, defect, confirmed cause, fix — becomes the most valuable document on the line over a year, because patterns emerge that no single event reveals. Balls that recur every time a specific paste lot is used, or every time a night-shift wipe schedule slips, are invisible until someone writes them down. Keep the log, keep the baseline profile, and the next ball case is a lookup, not a restart.
Some ball problems are worth outside eyes before you iterate alone. If the cause survives your measurements, if the defect is safety- or customer-critical, or if a new product repeatedly defeats a profile you have tuned carefully, that is the moment to bring in process help rather than keep adjusting. I.C.T, founded in 2012 with three self-owned factories in Dongguan and more than 1600 customers, supplies complete SMT assembly lines including the Lyra series of multi-zone reflow ovens, stencil printers, SPI and AOI systems, and turnkey line planning with installation, training, and on-site technical support. For fine-pitch and lead-free products where the preheat shape decides ball rate, a modular hot air reflow oven such as the Lyra733N gives process engineers room to move the preheat gently without disturbing the rest of the line. If you are working through a persistent solder-ball problem and want a second opinion on the process or the equipment configuration, our process engineers are happy to review your profile data and board construction with you.
9.1 What is the difference between solder balls and solder beading?
Solder balls are loose spheres on the board surface, often on the solder mask, and they are a short-circuit risk. Beading is a cluster of small balls trapped beside a component body, usually a chip part, and it often points to paste displaced by placement pressure. Balls scattered board-wide usually mean spatter or moisture; balls beside one component usually mean placement squeeze-out. The location is the fastest way to tell them apart.
9.2 Can solder balls be caused by the reflow profile alone?
Sometimes, but not always. A too-fast preheat ramp, flux spatter during heating, and paste outgassing from absorbed moisture all express through the profile and are fixed there. A dirty stencil bottom and placement pressure squeezing paste past the mask are print and placement problems that no profile change will fix. The right move is to confirm which family your balls belong to before adjusting the oven.
9.3 How do I confirm whether the ramp rate is too fast?
Profile a real board with thermocouples attached, including its heaviest thermal mass, and read the actual preheat ramp against the paste supplier's recommended window. If the measured ramp is violent and the balls are scattered board-wide, the ramp is the likely cause. If the ramp is gentle and the balls sit beside one component, the ramp is not the cause. Measure on the hardware, not on the oven display.
9.4 Do lead-free alloys cause more solder balls than tin-lead?
Lead-free SAC alloys wet more slowly than tin-lead and are more oxidation-sensitive, which makes a violent ramp more likely to throw balls, because the powder stays separate longer and any spatter has more time to freeze. The cause families are the same; the margin for error is smaller. Respect the profile window the paste supplier recommends and the ball rate stays manageable.
9.5 Will nitrogen reflow stop solder balls?
Nitrogen reduces oxidation during the molten window and can widen the process window for lead-free alloys, but it will not fix a dirty stencil, a moisture-laden paste, or a placement pressure problem. Use nitrogen where your defect data says wetting margin is tight, and keep it as one variable among several rather than as a cure for balls of unknown cause.
What is the single best habit to prevent solder balls? Document a measured baseline — profile on a real board, paste volume data, placement accuracy, and a defect log with causes — and confirm the print and the stencil before touching the oven. Most ball cases are print or profile problems decided before reflow, and a baseline plus a first-article check catches them early instead of after they ship.