English
Views: 0 Author: Site Editor Publish Time: 2022-05-16 Origin: Site


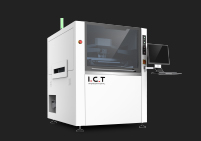
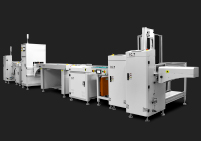
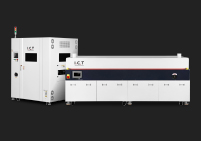
Full-auto SMT Stencil Printer is indispensable equipment in SMT process production. It is generally composed of board mounting, solder paste, imprinting, and circuit board transfer. Widely used are Full-auto SMT Stencil Printer and semi-auto SMT Stencil Printer These two types, next, let’s share with you the operating instructions of Full-auto SMT Stencil Printer.
This is the content list:
l What are the preparations before starting the Full-auto SMT Stencil Printer?
l How does the Full-auto SMT Stencil Printer perform track adjustment and positioning?
l What are the requirements for the stop position and identification of Full-auto SMT Stencil Printer?
l What are the requirements for the stop position and identification of Full-auto SMT Stencil Printer?

① Check whether the power supply and gas part of the Full-auto SMT Stencil Printer are normal
② Check whether there are tools in the active part of the Full-auto SMT Stencil Printer device to prevent the device from colliding when returning to the origin
③ After turning on the power of Full-auto SMT Stencil Printer, when the device is returning to the origin, no one can leave the device. If there is an abnormality, press emergency stop and troubleshoot.
④ Take out all the thimble and baffle for cleaning, and clean them completely.
⑤ Clean the surface of the Table with a cloth and alcohol, and there should be no foreign matter, solder paste or dust on the surface
⑥ Clean the surface of the rail side clamp with a rag and alcohol, and there must be no foreign matter, solder paste, or dust on the surface
⑦ Confirm whether the Full-auto SMT Stencil Printer wiping system is installed properly and the roller is installed in place
① Measure the length and width of the PCB on the screen frame ruler, and adjust the track width after inputting, put the PCB into the track, and confirm whether the width is appropriate and whether the import and export are smooth
② Put the Full-auto SMT Stencil Printer baffle and thimble on the Table, then put the PCB into the track, lift the Table and clamp it, and confirm whether the PCB can be clamped effectively. If it cannot be clamped, adjust the track width appropriately. And reconfirm the width of the entrance and exit until it can be clamped
③ To place the thimble, the direction of the chip thimble should be perpendicular to the squeegee or less than 45 degrees, the cylindrical thimble should be evenly placed, and the columnar thimble should be placed separately at the bottom of the dense foot components such as QFN, BGA to ensure that the squeegee is fully stressed.
④ After placing the thimble, gently shake the thimble by hand to confirm whether the thimble of the Full-auto SMT Stencil Printer will shake. If there is any shaking, it means that the bottom of the thimble is not flat and needs to be cleaned. Adjust the table height to ensure that the PCB printing surface and the side clamp surface are on the same plane on.
Full-auto SMT Stencil Printer's automatic stop position requirements: the center line of the printing area and the center screw of the side clamp are on the same line. Select the MARK point. The requirements: diagonal, regular shape, no interference in the area, and reasonable parameter settings.
Raise the Z axis and position the stencil. The pad of the Full-auto SMT Stencil Printer is required to coincide with the stencil opening. Clamp the stencil and set the stroke of the squeegee. The starting and ending positions of the squeegee should be on the clamping plate. , And the distance from the mesh is 30mm.
① Squeegee pressure, stroke, speed confirmation.
② Confirm the wipe system parameters of Full-auto SMT Stencil Printer.
③ Confirm the orbital speed parameters of Full-auto SMT Stencil Printer.
④ Confirm the stripping parameters of Full-auto SMT Stencil Printer.
⑤ Set the production parameters of Full-auto SMT Stencil Printer, check "Display adjustment window".
⑥ Automatically run the printing machine and insert the substrate (film board).
⑦ After the Full-auto SMT Stencil Printerstops, loosen the stencil, position the stencil precisely, and then lock the stencil.
⑧ Add solder paste, print the first film, and confirm the printing effect under a microscope.
⑨ Adjust printing parameters according to printing and demoulding effects.
⑩ After the first print is confirmed to be OK, set the production parameters, uncheck the "Display Adjustment Window", and the first 5PCS of batch printing need to be fully inspected to confirm the printing stability.